Merciful God, You are great in compassion and Your tenderness for us is without measure. We ask You to give us today our daily bread, and also provide for the needs of all of Your hungry children around the world. Through Christ Your Son and Our Lord. Amen.

Showing posts with label Frozen food. Show all posts

Wednesday, July 6, 2011

Strawberry Freezer Jam (and, of course, some biscuits to go with)

.

I have been making strawberry freezer jam every year for about 10 years. It's so simple -- really not much more complicated than mixing strawberries with sugar. And though I have been tempted to try to make "real" jam (cooked and processed instead of frozen) I really prefer the flavor and texture of fresh strawberries. That's the difference between this jam and "real" jam -- the strawberries are not cooked in this recipe, so you get that yummy fresh fruit flavor every time you open a jar. It's the best thing on toast -- nothing else compares. Yum!

This is just the recipe from the package of Sure-Jell. I noticed the last time I bought it that they now sell a Freezer Jam package. I don't know if the product was any different -- I think just the packaging. It tasted just like the jam I make every year.

I have just a few notes in the recipe in italics -- those are just my thoughts, learned from experience. You can double this recipe, and I did, though I wouldn't do that with just any jam recipe.

The biscuit recipe is easy as pie (easier, actually) and is the most wonderful recipient for that delicious, mouth-watering jam.


Strawberry Freezer Jam

2 cups crushed strawberries (buy 1 qt. fully ripe strawberries)
4 cups sugar, measured into separate bowl
3/4 cup water
1 box Sure-Jell Fruit Pectin


Rinse 5 (1-cup) plastic containers and lids with boiling water (or use any combination of glass jars and plastic containers -- I like the small jars because I am the only one who eats it -- yes my kids are picky about chunks of fruit in their jam). Dry thoroughly. 


 These are just grocery store berries, bought when they were super cheap. If you have a glut of garden berries, please do use those. I don't get more from the garden than we eat fresh, so I use grocery store berries, which are just wonderful for this purpose -- plenty of sugar to make up for any mediocre flavor.


Cut, but not yet crushed


Stem and crush strawberries thoroughly, 1 cup at a time (I cut the berries into smaller parts and crush about 2 cups at a time). Measure exactly 2 cups prepared fruit into large bowl (do not use more than 2 cups or your jam will not set up -- if you have leftover crushed berries, sugar them, and eat them over ice cream). 


Stir in sugar. Let stand 10 minutes, stirring occasionally.


 Crushed with sugar


In the meantime, mix water and pectin in small saucepan. Bring to boil on high heat, stirring constantly. Continue boiling and stirring 1 minute. Add to fruit mixture; stir 3 minutes or until sugar is almost dissolved. (A few sugar crystals may remain.)


Fill all containers immediately to within 1/2 inch of tops. Wipe off top edges of containers; immediately cover with lids. Let stand at room temperature 24 hours. (this last time I froze them right away and it turned out just the same)

Jam is now ready to use. Store in refrigerator up to 3 weeks or in freezer up to 1 year. Thaw in refrigerator before using (because jam has no preservatives, use it withing a month of removing it from the freezer).


Buttermilk Biscuits
makes about a baker's dozen

3 c. flour
1 T. baking powder
1 T. sugar
1 t. baking soda
½ t. salt
⅔ c. shortening
1 c. buttermilk

Preheat oven to 450 degrees F.
Combine flour, baking powder, sugar, baking soda and salt in a large bowl. Cut in shortening. Add buttermilk and stir into a soft dough. Knead dough on floured surface and cut into rounds with a biscuit cutter. 
Place on a baking sheet and bake 10-12 minutes.


.

Friday, March 18, 2011

Sweet Irish Treats

.


The Feast of St. Patrick's Day is always a big one to celebrate in our house. It's hardly possible to completely miss it with so many reminders in our culture. Secretly I always get a little giggle out of the fact that our secular world celebrates this great saint's day. Yesterday I was driving my son home from his drum lesson and a local elementary school was letting a huge sea of green out the front doors. Too funny! I just wish all those children really knew what a great saint they are celebrating!

Last night's dinner of Irish fish and chips and Fried Cabbage was a great way to celebrate this great saint, and our desserts, two new "recipes" offered a tasty ending to the day. We don't normally indulge in dessert during Lent, but St. Patrick's Day and St. Joseph's Day are two exceptions to the rule. There are an awful lot of Irish saints on the liturgical calendar, so you won't have to work too hard to come up with an excuse to celebrate with a yummy Irish dessert.

Both desserts are simple and should be assembled just before serving. The Irish Jig is a simple mix of whipping cream, sweeteners, whiskey and coconut cookies. The whiskey is really the flavor of the dessert, so if you don't like whiskey, you won't like it. I had some Southern Comfort on-hand and used it instead of whiskey. Southern Comfort is a fruit, spice and whiskey flavored liquer which was created by an Irish bartender -- so close enough for me.  The younger children enjoyed Shamrock Shakes instead -- a homemade take on that fast food treat.


Irish Jig
serves 4

2 cups cold whipping cream
2 T. sugar
1 T. powdered sugar
1/2 t. vanilla
2 T. Irish whiskey
1 cup crumbled coconut macaroons (I used Archway brand)


Whip cream in a mixer on high speed with sugars until thick and soft peaks form. Add whiskey and vanilla and finish beating until stiff. Fold in cookie crumbs. Serve in dessert glasses.

~~~~~


Shamrock Shake
serves 2
3/4 cup milk
2 cups vanilla ice cream
1/2 t. peppermint flavoring
4 drops green food color
2 T. sugar
whipping cream (from the can) 
green sprinkles

In a blender, or large plastic glass for use with an immersion blender, combine all ingredients except whipped cream and sprinkles. Blend until thick and creamy. Pour into two fancy glasses and top with whipped cream and green sprinkles.


.

Friday, August 27, 2010

Breakfast in the Freezer

.
Jamie got me thinking last week about how nice it would be to not have to think about breakfast every day (or more realistically, not to feel guilty over my kids eating cold cereal -- or PopTarts! -- every day). I got my act together and on Saturday I planned about an hour -- that's all -- and made a loaf of French toast and a big batch of pancakes. It was so nice to be able to offer the children (and myself) a nice hot breakfast this week, in no more time than it takes to make toast.


Freezer French Toast

equipment:
shallow bowl or glass dish
measuring cups
spatula
frying pan or skillet
baking rack
pan or cookie sheet that will fit in the freezer
freezer bags
wax paper

ingredients:
1 loaf white bread
5 large eggs
1 1/4 cup milk
1 t. vanilla
butter for frying

Whisk together eggs, milk and vanilla. Heat griddle or frying pan over medium high heat. Add 1 tablespoon butter to pan and heat until foamy. Dip bread, one slice at a time (as many as your pan will hold) and place on hot pan. Cook until golden brown on one side, then flip. Remove toast from pan and place toast on a baking rack. I like to cool the pan off a little between batches so the butter doesn't burn, so move pan off heat for a minute. While the pan is cooling, place toast slices on pan or cookie sheet. Place pan in freezer. Repeat cooking and freezing process with entire loaf of bread. As you are cooking bread, every five minutes or so remove bread from freezer and place in a freezer bag with wax paper in between stacks.

Reheat in the toaster on "frozen" setting or slightly longer than a piece of bread.


~~~~~~~~~~

Freezer Pancakes

equipment:
large mixing bowl
measuring cups
ice cream scoop or 1/3 cup measuring cup
spatula
frying pan or skillet
baking rack
pan or cookie sheet that will fit in the freezer
freezer bags
wax paper

ingredients:
2 eggs
2 - 1/2 cups buttermilk
1 t. baking soda
2 - 1/2 cups flour
2 T. sugar
4 t. melted butter or oil
3 t. baking powder
1 t. salt
1/2 t. vanilla


Beat all ingredients together until smooth. Using ice cream scoop or 1/3 measuring cup, scoop batter onto lightly greased griddle. Flip when bubbles appear.
Remove pancakes from pan and place on a baking rack. Continue cooking pancakes. While you have pancakes cooking, occasionally move cool pancakes to pan or cookie sheet. Place pan in freezer. Repeat cooking and freezing process with entire bowl of batter. As you are cooking pancakes, every five minutes or so remove pancakes from freezer and place in a freezer bag with wax paper in between stacks.

My pancakes tend to be a little messy because I am always flipping them before they are ready (tsk, tsk!), so I use this little trick to make them look perfect when I serve them. Take your (impeccably) clean kitchen shears and cut off any out-of-circumference bits -- then your pancakes will look just like a professional's pancakes!

Reheat in the microwave on high. It usually takes about a minute for three pancakes in my micro.


.

Wednesday, September 2, 2009

Convenience Meat

.


The last time I went grocery shopping, I bought an extra three or four pounds of ground beef because it was on sale. I used part of it for hamburgers, and while I was making them, I just kept on making them. I eventually used up all the ground meat into little quarter-or-so pound patties. I used to do this all the time but had gotten out of the habit. It's a good habit to be in.

When I form all the ground beef into patties, I can use them for burgers -- I just have to thaw them, season them, and throw them on the grill. Or I can just pull four patties out of the freezer and thaw them for a pound of beef to use in meatloaf or meatballs or tacos, etc. The meat thaws much quicker in patty form, so if I forget to take it out early in the day, it takes only an hour or so to have thawed meat.

Take a pound of ground meat (or if you have a two- or three-pound package first divide into two or three parts) and divide into approximate quarters. Form each quarter into a patty and place waxed paper or parchment in between. Place four in a quart size
freezer ziploc bag or eight in a gallon size freezer ziploc bag and freeze.

.

Tuesday, August 18, 2009

Putting up Produce

.

The week before we left for vacation, I found myself with much more fresh produce than we could possibly eat. Our co-op had skipped us on fruit the week before, so we had double the peaches we normally get, plus a bumper of green beans -- some from the farm and some from the store. This time of year the beans always look so beautiful that I sometimes get carried away buying them. We also had a bumper of tomatoes from our garden and some jumbo zucchini from a variety of sources.

Since I have not yet overcome my fear of canning (is there a support group for us?), I resorted to freezing. Among all the things I had to do to get ready for six of us to spend a week in a house a 12-hour car ride away, I had to do prepare and freeze all this produce -- it would have been a sin to waste. I admit, though, I also freeze produce just because I find it for a good price at the grocery store -- like when green beans go on sale. They freeze especially well. Berries, too.

Fortunately, freezing produce is not quite the process that canning is. In fact, it's really quite simple. I share here the basic steps for freezing some vegetables and some fruits. You can easily find this information at any state extension service (this one from my great state is a good one -- download the ones you need, print out, and keep with your cookbooks). Your extension service will tell you which foods need to be cooked before freezing, which need special treatment, etc.

For beans and other foods that need to be blanched before freezing:

Trim the ends of the beans and rinse in cool water. I cut mine into more bite-size pieces, but you can leave them whole, too. I also only do about a pound at a time -- it's just easier for me to handle. I did a total of 3 pounds in about 20 minutes.


Bring a pot of water to boil. When it boils, drop in cleaned beans and bring back to boil. Boil for one minute.


With a slotted spoon, remove beans from water (you'll want to continue using your hot water for more beans) and drop them in a large bowl of iced water. Let sit for about as long as they were in the hot water -- this depends on how long it took for your water to re-boil.


Drain and remove any remaining ice cubes. Dump beans onto paper towels to air dry.


Place in freezer bags (or plastic containers, but I like freezer bags because: 1) they are cheap; 2) I can remove the extra air) and remove all of the air with a straw before sealing. Label and freeze promptly.

~~~~~~~


For foods that can be frozen without cooking, like squash, onions, or peppers.

Normally when I find myself with too many zucchini, I bake. The week before vacation I just couldn't fit it in (other than some Chocolate Zucchini muffins which we took in the car). It took just a few minutes to wash, grate (in the processor on small shred), and bag up several large zucchini and yellow squash. Now I have a stash for winter baking. Use the same process as above for green beans to bag and suck out the air. Label and freeze.


~~~~~~~

For fruit, those which require peeling and syrup pack:

The peaches I froze were some of the best peaches I've ever eaten. It was almost a sin to freeze them, they were so good fresh. But other than eating 10 in one day, I had no choice. I am hoping that they will be almost as good when I thaw them. These peaches were perfectly ripe. When I cut them, the slices fell away from the pit. That's a perfectly ripe peach. I had my Peach take a picture of how they fell apart in my hand.


I processed about 5 really large peaches at a time -- filling two quart-size freezer bags with each batch. I didn't get pictures of every step, but you're a smart girl and I know you can do it.

Bring a pot of water to a boil. When it boils, drop in the peaches. Boil for one minute. Remove from pot and when you can handle them (but don't let them cool), peel them. The skins should fairly easily slip off. If not, you didn't get them hot enough.

Slice peaches into a large bowl. Add the juice of half a lemon, or if you are slices more than about 5 large peaches, a whole lemon. You could also use ascorbic acid, but I prefer lemon juice. This step is only for fruits that brown -- berries, melon, grapes, cherries don't need it.


Make syrup -- I used a light syrup, about 1 cup sugar to 3 cups water (you can find the recipes for heavier syrups at the extension service website). Bring sugar and water to a boil and cook until sugar dissolves. Cool.

Place fruit slices and any juices into freezer bags. Pour in syrup until fruit is pretty well covered. Zipper the bag closed almost all the way, stick in the straw and suck out any remaining air. Zip closed completely. Label and freeze promptly.


Just as lovely as the thought that I have yummy fresh foods in my freezer, is peeking in and
seeing them. The night after I placed the peaches in, I could be seen opening the freezer door just to look at them. Silly me.

.

Friday, July 25, 2008

Recipe Review -- Frozen Food

.
I thought I'd spend a few minutes today giving you a quick review of what worked from my Great Freezer Food Experiment. I mentioned in my weekly menu post that I felt great relief at having dinner in the freezer each day during my recovery. I can't say enough about that. If you are expecting a baby or planning for a time when you may be "indisposed" to cooking, plan ahead and freeze some meals. The time it took to prepare the meal for freezing was less than if I had started and finished it -- because the cook time was absent. And the time for cooking it after it was frozen was effort-free. I just popped the food in the oven and waited for the smells -- the best part.

While I have just a few meals left to eat, I will tell you what was a success -- almost everything.

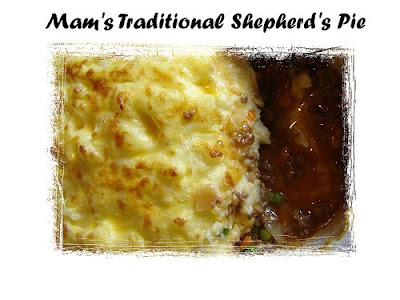
Deborah's Bechamel Lasagna and Shepherd Pie were wonderful. I did not change a thing, except for the freezing part, and these recipes are definitely ones I will make again. I thawed both almost all the way before baking because I was afraid they would have to bake for hours starting frozen. So, I popped them in the fridge the night before, slipped the foil and plastic wrap off in the morning, and put the food in the original freezing dish to thaw completely (remember that trick? scroll down to the bottom). Then I baked. I don't think there was any flavor or texture loss -- even in the mashed potatoes. Both dishes were well-received by my family as well. The boys noticed the celery in the lasagna and started fussing, but after one bite I noticed that they were eating it. Peach ate three servings and leftovers the next day. They also fussed a bit about the peas in the shepherd pie and two of the boys pushed them aside as they ate. But the entire dish was empty by the end of dinner. Both will be regular dishes here from now on. (Thanks, Deborah!).

Two of my freezer experiments, mashed potatoes and cooked rice, also turned out great. These were true experiments because I had no idea how they would come out. I made a huge batch of both mashed potatoes and rice (quadrupled what I normally make). I realize that rice is really not tough to throw together for dinner, but I was not certain what shape I'd be in and wanted it to be easy enough for Doug or the kids to manage. So I made one big batch of each, cooled them, portioned them out -- a dinner's worth in each of my freezer bags, pushed all the air out and froze it flat ( I smashed the potatoes and rice down so it would be evenly distributed in all corners of the bags). For the rice -- I thawed it overnight in the fridge and just heated to hot in the microwave. For the potatoes, which got a little watery, I thawed them overnight in the fridge, then dumped them in an oven-safe dish and baked them at 350 degrees until they were hot. A little pat of butter on top didn't hurt.

My baked goods were all good -- that's a pretty safe thing. The Pumpkin Streusel Muffins are always a big hit in my house, and Matilda's Lemon Zucchini Muffins were really good with dinner one night, too. The kids really enjoyed having the Classic Crumb Coffee Cake and Chocolate Chip Pumpkin Bread on nights when dessert was absent, too. The key to freezing baked goods is to wrap them in plastic wrap and then pop them into a freezer bag. You can eat them right out of the bag (after they thaw, of course) or heat them briefly in the oven. My French bread loaves turned out well, too. I wrapped the cooled baked bread in wax paper first, then aluminum foil. Then, after thawing, I popped them into a 400 degree oven for five minutes and they were just like fresh baked bread. I'll be sure to double my bread recipe from now on and freeze a loaf.

My favorite experiments, though, were the Crock Pot meals. Matilda suggested prepping the meals, them putting all the contents in a freezer bag. Then, on cooking day (or actually the day before), thaw the meal in the fridge and dump the contents into the Crock Pot. To steal a phrase from Rachael Ray, "How cool is that?" These were so very easy and the meal tasted like I had started it that morning. It took less than an hour one Sunday to prep three Crock Pot meals (Hearty Beef Stew, Continental Beef, and Italian Beef), and it took no time at all to dump the meal into the Crock Pot and turn it on. This is a great technique for when you find a great deal on a specific cut of meat -- just buy a lot and make freezer meals.

The one disappointment in my freezer meal experiment was biscuits. I made several dozen Buttermilk Biscuits and froze them to bake when needed. I had read that you can freeze them unbaked and then bake the biscuits right out of the freezer. Well, maybe another recipe would work, but my regular Buttermilk Biscuit recipe did not. They tasted fine, but they didn't rise much. So they were crisp on the outside, but kind of soggy on the inside. If you have a great trick for freezing biscuits -- please clue me in. I'd like to try again.

All in all, I'm a convert to the freezer meal business. I'm going to think a lot more about doubling our favorite meals and packing them away for a rainy day. I just don't think you can go wrong by doing it.


.

Monday, June 30, 2008

More Freezer Business

.
I know, I know. It's getting old. But, if you ever need a freezer full of food, you'll thank me.

This past weekend, I put away:

Italian Roast Beef for sandwiches to be served with baked potatoes and salad (a recipe similar to this but I added onions, but no cheese)

Continental Beef to be served with buttered noodles and a vegetable

Hearty Beef Stew to be served with French Bread

Three batches of Spaghetti sauce

Several dozen buttermilk biscuits

Two Coffee Cakes

Blanched Carrots

French bread

The first three menu items I prepped and froze to cook later in the Crock Pot. I highly recommend this method. While I haven't, of course, tasted the food yet, the method seems pretty foolproof. It took much less time to assemble, than if I had fully cooked all that food. And it will, of course, take very little effort to thaw the food overnight in the refrigerator, then dump it in the Crock Pot. Doug said he can manage that much. I managed to get about three meals prepped and in the freezer in about an hour. I don't usually work ahead for meals that way because I'm home everyday to make dinner. But if I ever have a need, or if you are a working mom, it's really a great method. It all looked and smelled delicious and I can imagine that after freezing the meats in the sauces, and then cooking them in the Crock Pot, they will be delicious.

,

Friday, June 27, 2008

What's in the freezer?

.
Well, by now I'm sure you know that I am consumed with filling my freezer for my upcoming surgery and recovery. Today is an update on what's in there so far. I'm not as far along as I had hoped, but the good news is, at my doctor's appointment yesterday, I learned that my recovery will likely be shorter than the five weeks I was afraid of. I'm sure I won't be cooking big meals at the two-week marker, but I might be able to handle a few simple dishes.

So far I have:
Red Beans and rice (my research revealed that the best way to freeze rice is to cook it, place it in a freezer bag in a thin layer, and freeze; reheat in the microwave after thawing)

Baked Steak, mashed potatoes, steamed carrots

Melt in your mouth Braised and Barbecued Chicken, white rice, steamed carrots

✓ Oriental Sesame Chicken Strips, white rice, green beans

Bechamel Lasagna, French bread, serve with salad

✓ Orange Teriyaki Chicken, white rice, green beans

✓ Marinated Chicken to serve with baked potatoes and buttered corn

Five Cheese Lasagna, French bread, serve with salad

Porcupine Meatballs, mashed potatoes, serve with buttered corn

Deborah’s Shepherd Pie, serve with biscuits and fruit

Lemon Zucchini muffins

Two loaves Zucchini Bread

Two loaves Chocolate Chip Pumpkin Bread

Pumpkin Streusel muffins

Four batches Buttermilk pancakes

I'm going to make two batches of Spaghetti Sauce today, and more French bread. I might even make up some French bread pizzas. I'm running out of freezer room (even with an extra side-by-side fridge) so I may have to start running food over to my mom's.

.


Tuesday, June 17, 2008

Freezer Meal Festival

.

Freezer Meals have caught quite a bit of attention in the past few years, especially among the busy moms who do once-a-month cooking. Admittedly I've never done more than double a recipe and freezing the second half for later. And while that is often very convenient (there's really nothing like pulling your own homemade food from the freezer in the morning and knowing you your dinner is done), sometimes it's just absolutely necessary. As I mentioned last week, I have a major surgery scheduled this summer, and there is just no way to get through the weeks following without a stockpile of meals. If it were just two or even three of us, we could get by on store-bought frozen meals and carry out. But with six people in a family, four of whom are, for all practical purposes, adults, I need to prepare my own meals.

After crying out for help (which isn't easy for us moms, is it?), a few of my favorite online friends answered the call. While I really rather have them pay me a visit with a hot casserole, their tips and recipes are most appreciated.

~~~~~~~~

Deborah, at the new Tastie, sent me some links to the recipes she recommends for freezing. Deborah says that their freezers in Ireland aren't really large enough for freezer meals, but she assures me that these are good, freezable meals (I can't imagine not having my extra freezer, much less not having one big enough for an extra meal -- so sorry for you Deb).

Lasagna is not only a traditional comfort food (and thus a good recovery food), it is also a traditional freezer food (after all, where do you think Stouffer's made those millions?). Deborah recommends trying her bechamel version, which I fully intend to do. Deborah recommended preparing it up to the last layer of mozzarella, freezing it, and baking it straight from the freezer. To take a page from the once-a-month cooks, I'll put the last layer of mozzarella cheese in a freezer bag and tape it to the frozen lasagna with directions for adding it in the last part of the baking time.


picture from Tastie


Another recipe from Deborah's files is Shepherd Pie. I can't imagine a better person to give me a Shepherd Pie recipe, than someone who is Irish by birth. Again Deborah says prepare it up to the baking step, freeze it, and bake it straight from the freezer.

Thank you Deborah, I'll say a little prayer for you when we these dishes come to the table.

~~~~~~~~

Herbs pictured by recipes4us.co.uk


My dear friend from Texas, the Waltzing Matilda, dedicated a post yesterday to freezer meals. She offers many great suggestions, but I particularly love the idea of of pre-assembling crock pot meals. I think even my husband can manage a crock pot meal if it's already assembled for him. I also like the sounds of the Teriyaki Tenderloin recipe she links to. I'll definitely get a few of those in the freezer with a few boxes of my favorite Birds Eye packaged vegetables.

Thank you Matilda, for taking pity on me! I will remember you during my recovery and offer up a few prayers.

~~~~~~~~

Kristine from The Cookin' Sisters & Friends sent me a soup recipe that sounds really good and comforting. The recipe came from www.smittenkitchen.com and Kristine says when you freeze it, the soup gets thicker and heartier when you thaw and reheat it. It's one of her favorite soups and she says it's "so easy you might cry."

Here is the recipe with a few of Kristine's tips:

*Last time instead of using ham, I threw in some leftover bratwurst, which I prefer. Or you could skip the meat all together.

* the notes are Deb's of SmittenKitchen, but I also used the spinach instead of arugula. Believe me you can pack this baby with a LOT of spinach.


Fast White Bean Stew
Adapted from Gourmet, January 2007

2 large garlic cloves, chopped
1/4 c. plus 1/2 T. extra-virgin olive oil
1 (14- to 15-oz) can stewed tomatoes
1 3/4 c. reduced-sodium chicken broth
2 (19-oz) cans cannellini beans, rinsed and drained (3 cups)
1 (1/2-lb) piece baked ham (1/2 to 3/4 inch thick), cut into 1/2-inch cubes
1/4 teaspoon black pepper
1 (5-oz) bag baby romaine (er, what? I used spinach)
or baby arugula (10 cups loosely packed)
8 (3/4-inch-thick) slices baguette

Cook garlic in 1/4 cup oil in a 3 1/2- to 4 1/2-quart heavy pot over moderately high heat, stirring, until golden, 1 to 2 minutes.
Coarsely cut up tomatoes in can with kitchen shears,
then add (with juice) to garlic in oil.
Stir in broth, beans, ham, and pepper and bring to a boil.
Reduce heat and simmer, uncovered, 5 minutes.
Stir in greens and cook until wilted, 3 minutes for romaine or 1 minute for arugula.

While stew is simmering, preheat broiler.
Put bread on a baking sheet and drizzle with remaining 1/2 tablespoon oil.
Broil 3 to 4 inches from heat until golden, 1 to 1 1/2 minutes.

Serve stew with toasts.

Thanks, Kristine. I'll offer one up for you.

~~~~~~~~


Lana at Knit and Pray sent me a few recipes she thought my gang could handle. With our recent cooking lessons, she may be right.


Crockpot Pasta

8 oz.small shell pasta
1 can mushrooms
8 oz. mozzarella cheese
1 pint sour cream
8 oz. provolone cheese
1 qt. spaghetti sauce
1 lb. hamburger, cooked

Mix sauce, hamburger, shells and mushrooms together.
Put half in crock pot, sour cream over this and sliced provolone,
now rest of sauce mixture with sliced mozzarella on top.
Cook on low for 6-7 hours.


Easy Chicken Pot Pie

1 2/3 c. frozen mixed vegetables, thawed
1 can cream of chicken soup
1 c. chopped cooked chicken
1 c. biscuit mix
1/2 c. milk
1 egg

Mix vegetables, chicken and soup in ungreased 9" pie plate.
Stir remaining ingredients with a fork until blended.
Pour into pie plate. Bake at 400 degrees for 30 minutes.
(Chicken could be cooked, chopped and frozen ahead of time
and thawed with the vegetables.)


Kentucky Fried Chicken

3 c. flour
1 T. paprika
2 env. Lipton Cup-a-soup (tomato)
2 packages Good Seasons Italian dressing mix
1 t. seasoned salt
chicken pieces

Preheat oven to 350.
Combine in a plastic bag.
Coat chicken pieces.
Place on well greased cookie sheet.
Coat with melted butter.
Let bake for 1 hour.
For crisper chicken, baste every 15 minutes with 1 t. oil and 1 t. water per piece.


And a few of Lana's tips:

*Pancakes freeze well as do homemade biscuit and sausage sandwiches.

*Cookies and cookie dough and banana muffins for treats are good to freeze as well.

*Meatballs freeze well and can be used to make sandwiches or with the traditional spaghetti and meatballs.

Thank you so very much, Lana. I'll remember you with a couple decades.

~~~~~~~~

Barb at SFO Mom and Mom's Fridge did me the huge favor of going through her archives for some great freezer meals. I read Barb's menus every week and I know she serves up a great dinner every night, so I really appreciate the offering.

The first one, Barbecued Chicken, is a marinade that Barb freezes the chicken in. I have done that before, and the meat marinades as it thaws -- it's a foolproof technique. I think this marinade is calling for some chicken legs!

Another chicken recipe link she sends is for Paula's Sesame Chicken Strips. I've not tried this one, but I will, along with this Hawaiian Chicken recipe. Yum!

Barb also sends a recipe for Chicken Divan which I haven't had in a few years. She says if I don't want to put the casserole together, I could freeze the parts. I might just put them in individual bags with directions for the boys to put it together (although if I leave it to the boys they might "lose" the broccoli).

This recipe for Bourbon Chicken Bites is tried and true in my house. It's one of the boys' favorites and it really couldn't be easier (although I suppose just pulling it out of the freezer and popping it in the oven officially makes it easier).

This recipe for Goulash is just dying to be pre-assembled for the Crock Pot. I think after my recovery my guys will be expert crock pot cooks. This Chicken Chili and this Stew look like good candidates, too.

And finally, Barb's Five Cheese Lasagna looks very yummy. Who ever had too much lasagna?

Thanks, Barb, you really came through for me. I owe you one, or two, or three (Hail Marys).


Many thanks to the wonderful ladies who lended me their favorite freezer recipes. I know that they will become regulars in my house, frozen or not.

From my own experience with freezer meals, I would like to add that when you have the need for many frozen meals, like I will, you don't want to tie up all your baking pans, and you don't want to invest bucks in foil pans (I am not a fan of aluminum anyway). One technique I learned from Don't Panic, Dinner's in the Freezer is when you are making and freezing a dish, first, line your pan with long pieces of aluminum foil. Then layer the foil with plastic wrap (so the foil is not touching your food the plastic is). Place your food in the dish and fold over the long ends of plastic wrap and then the foil. Freeze until solid. I then wrap it in another layer of foil, or place it in a large freezer bag. Be sure to label it. When you are ready to thaw and bake (or even bake frozen), remove the outer foil layer, then the plastic wrap (rinse briefly with warm water to release if necessary). Place food in the original dish you froze it in and either thaw completely and bake, or bake in its frozen state. By using this method, you save room in the freezer (stacking just the food takes up less room then stacking pans), and you free up your dishes for other freezer meals and baking.

Another tip is to freeze liquids and foods like marinating chicken on a flat pan or in a dish. Then, when frozen, stack them (don't forget to label). They will be easier to stack and access if they are flat (like the picture at Matilda's).


Tuesday, June 10, 2008

Join the Freezer Meal Festival


I mentioned over on my other blog today that I'm going to be having a big surgery in less than a month. I've had a few little pesky surgeries before, but nothing on this scale. I'll likely be down for several weeks. Thinking about it, I'm really not sure where to begin planning. I can certainly be caught up with laundry, and have my house clean, but I've no clue how to prepare -- except in the kitchen. I do know how to be prepared there.

I already have a few meals in the freezer, and I'm going to go through my favorite freezer meal cookbook, but I don't think I can get three or four weeks worth of meals from there. So, I'm turning to my foodie friends for a helping hand. While I'd really like a meal delivered to the door, I don't think that's going to happen. So, lend me a hand and send me your favorite freezer meal recipe. My husband and children will be ever so grateful!

I'll post the recipes on June 18, and that will give me a couple weeks to cook my buns off. So email me your recipes, friends, or leave a link in the comment box. You're a doll!

.

Thursday, April 24, 2008

It's Time Again


For these. The kids have been begging me and I finally caved. I made cherry. Mmmmm.

These totally violate my rules about chemicals in food, but they have to be better than Fla-vor-ice. At least they taste better. Waaaayyy better (although my favorite is raspberry.


.

Thursday, January 3, 2008

Frozen Food

I have lots of leftovers from the Christmas season, some of which I hate to waste. I need to go through my fridge and figure out what can be frozen. Answering another reader's question about freezing cookies, I went looking online for a chart to determine how long food can be frozen. There are a few out there, but I thought I'd link to this one since it looks pretty comprehensive. I'm going to print it out, put it in a ziploc bag and put it in the freezer. And make sure you date the stuff going on -- you know you won't remember.

.