Merciful God, You are great in compassion and Your tenderness for us is without measure. We ask You to give us today our daily bread, and also provide for the needs of all of Your hungry children around the world. Through Christ Your Son and Our Lord. Amen.

Showing posts with label Main Dishes. Show all posts

Tuesday, October 8, 2013

Pierogies with Bacon and Peas


I realize this recipe is not for everyone (including members of my own family), but it's a comfort dish to me, and maybe will be for you. It's easy -- you can whip it up in less than 25 minutes, and it's good rib-sticking food for autumn and winter. Because the menfolk in my family will not eat it, ahem, I save this dish for a night when just Faith and I are home and we both love it.

The recipe came from Cooking Light (though I doubt the "lightness" of it), and I make it almost the way it's written -- a little less bacon and onion and regular sour cream instead of low-fat. I am posting it the way I make it. Be sure to slice the onion like an apple so that the pieces are big enough for picky onion eaters to remove them.

This is a great dish to serve for the feast of St. Faustina, Blessed John Paul II, St. Maximilian Kolbe, St. Teresa Benedicta (martyred in Poland) or any of the Polish saints, as pierogies are a traditional Polish dish.


Pierogies with Bacon and Peas


12 frozen potato and onion pierogies (such as Mrs. T's)
4-6 slices center-cut bacon
1 onion, peeled and sliced vertically
1 t. sugar
1/4 t. dried thyme
1 cup frozen green peas
salt and pepper to taste
1/4 cup sour cream


Place frozen pierogies in a bowl of tepid water, high enough to cover them.

Cook bacon in a large nonstick skillet until crisp. Remove bacon; crumble. Increase heat to medium-high. Add onion, sugar, and thyme to drippings in pan; sauté 5 minutes. Stir in peas; sauté 1 minute. Drain pierogies and add them to the skillet, Salt, and pepper; cook 30 seconds. Sprinkle with crumbled bacon. Taste for seasoning and adjust if necessary.

Serve with sour cream.


I suggest serving with warm applesauce, or a green salad, and soft rolls.


Source: modified from Cooking Light


Sunday, July 28, 2013

Pineapple Pulled Pork


I have come to the conclusion that if I am to continue to post recipes and thoughts about cooking, I am going to have to do it while the thoughts are fresh in my head -- like immediately after dinner. Sad as it is, I can't keep a thought in my head these days for very long, especially a subtle change I may have made in a recipe, or even where I found it in the first place! I am sad to admit I might be getting senior brain! Ahhh!

Anyway...enough about my forgetful brain...this is a recipe you won't forgot, not only because it's so easy to make, but because it's so tasty. I just cleaned up the dishes and here I am with all my fresh thoughts.

The easy to tasty ratio of this recipe is perfect. I put the pork shoulder in the slow cooker this morning before we left for Mass and after spending some time this afternoon traveling to help Doug's mom with some household stuff, we returned home to some yummy smelling pork.

The taste is similar to a barbecued pork, but the pineapple flavor is definitely there and the flavors are a little more mellow. The texture was very tender -- but was not falling off the bone, so it wasn't mushy at all.

We love our pulled pork with cole slaw, so each sandwich was served with a toasted Hawaiian slider bun and a dab of cole slaw.

The recipe idea originated here at The Beeroness, but I made quite a few changes. We had many types of beer in the fridge downstairs, but none were IPA and not knowing a stout from a lager (I rarely drink beer), I chose to add about 4 oz of good white wine instead. If you'd rather not add alcohol, I think a 1/2 cup of pineapple juice would be wonderful, too.


Pineapple Pulled Pork
makes 24 sliders


4 cloves of garlic, peeled
¼ cup low sodium soy sauce
2 T. Worcestershire sauce
1/4 cup Heinz chili sauce
2 t. sriracha
2 T. brown sugar
2 cup chopped pineapple (I used frozen nuggets, slightly thawed)
3.5 lb pork shoulder
salt and pepper
12 ounces IPA (or 1/2 cup good white wine or pineapple juice)
24 Hawaiian rolls, split


In a food processor or blender add the garlic, soy sauce, Worcestershire sauce, chili sauce, sriracha, brown sugar and pineapple. Process until well combined.
Place the pork shoulder inside a slow cooker, salt and pepper all sides liberally.
Pour the pineapple mixture and the IPA beer over the pork.
Cook on low for 8 hours.
Remove roast from slow cooker and cool a little before shredding. Strain juices. After shredding pork, pour some of the juice over and let sit. Use a straining spoon for serving.

Serve with cole slaw, fresh fruit salad, a pasta salad, or serve over steamed white rice instead of buns with some steamed green beans.


Tuesday, June 18, 2013

Rice Krispies never tasted so good


This is not another one of those breakfast casseroles. I know, the name sounds tired, but this casserole is super tasty, and makes even a great easy supper. I make it quite a bit, both for brunch after Mass (set the oven on Timed Bake and come home to a hot yummy brunch), and for dinner.

I know I said the Rice Krispies never tasted so good, but those were actually just a substitute for cornflakes when I made it one evening recently and discovered I didn't have Corn Flakes. Rice Krispies worked just as well. And the recipe says refrigerate overnight, but you can throw it together ten minutes before it goes in the oven. I think making it the night before is just convenient when you want to eat it for breakfast, but don't operate well in the morning.


Ham and Swiss Breakfast Casserole

10 slices of bread (I have used leftover hamburger or hot dog buns just to use them up)
1 # deli ham, diced
8 oz, swiss cheese, sliced or shredded
6 eggs
3 c. milk
1/2 t. garlic salt
pepper, to taste
8 oz. shredded cheddar cheese
4 T. butter, melted
1 c. cornflake crumbs (I did not crush the krispies)

Grease 13 x 9 pan. Lay bread slices on pan bottom (I almost never use 10 slices -- I think I max out at 8 overlapping them. Just make sure the bottom of the dish is well covered with bread).
Place diced ham on bread, making sure bread is covered. Cover ham with cheese, either slices or shredded. 
In a large bowl, beat eggs lightly (until whites and yolks are combined) with milk. Add seasoning to eggs. 
Pour egg over cheese. Top with cheddar cheese.
Mix melted butter and cornflake crumbs and sprinkle over the top of the cheese. Bake at 350 degrees for an hour (or until center of casserole puffs up as high, or higher, than sides).

Serve with some fresh fruit, or fruit and yogurt for a nice brunch, or with a salad for dinner.


Source: my mom


Wednesday, March 6, 2013

Slow Cooker Cheesy Chicken and Rice


Well, look, there is a real person at this blog. And today there is a real recipe. Three cheers, eh?

I've been pinning many recipes, but trying few. Mostly I've been eating from the freezer (meals made times three, and two frozen) or just preparing dishes that are on the regular rotation (favorite meals).

This meal is certainly not fancy, but on a very cold night, with a winter storm on the way, it was comforting, and having put it in the crockpot on high at 1 p.m., and then having left the house for appointments, it was a welcome sight when I arrived home hours later. It smelled awfully good, too.

Essentially you only put the chicken, onions and cream of chicken soup in the crockpot. The corn, rice and cheese you add just before serving. I was a little surprised when I read the recipe, because I assumed that it was a dump-everything-in-and-cook recipe. I used my rice cooker (one of my favorite small kitchen appliances) to cook the rice and add it just before serving.

The original poster (Christy Jordan's Southern Plate) used Zatarain's yellow rice, but my family favorite is Goya. Having spent many of my formative years (those teenage ones, if truth be known) in Tampa, Florida, I ate a lot of Cuban yellow rice with chicken. Yellow Rice with Chicken (green peas mixed in -- it's traditional) was available in the cafeteria at school every day, and we really learned to love it (the white kids -- the Cuban kids already loved it), and many restaurants served it as well. It was just a regional standby. I think the Goya yellow rice tastes more authentic, but use what you like.

I also subbed out my own cream of chicken soup (found at the bottom of this recipe post). It only takes a minute to make, really, and it tastes better. Use a good quality chicken soup base or bouillon cube that doesn't include MSG.

I'll tell you, my husband looked at this dish in the bowl and did not make a happy face. He does not generally like chicken and rice dishes. But he took a bite and said, "Mmmmm." And then another "mmmmmmm." And he cleaned his plate like a good boy. The kids liked it, too, except an onion hater who could still see onion pieces with a microscope.

I think you could definitely substitute another vegetable for corn in this dish. I would use cooked carrot coins (or just add the carrots earlier in the process) or frozen peas (I would love that but no one else in my house would except Faith). Both would probably be more visually interesting than corn, and more nutritious, but for the first try I stuck with the recipe, except to double it and freeze the leftovers.


Slow Cooker Cheesy Chicken and Rice
serves 10-12 


6-8 boneless skinless chicken breasts (I halve them lengthwise so they cook quicker)
1 large white onion, chopped 
2 -8 ounce box Goya Yellow Rice Mix, cooked according to directions
1 cup cheddar cheese
2 - 10.5 ounce can cream of chicken soup (or two recipes of homemade)
1 bag frozen corn 

Place chicken in bottom of slow cooker. Scatter chopped onion over top. Spoon cream soup over top of that. Cover and cook on low 7-8 hours or on high 3-4 hours. About 30 minutes before serving, break up chicken with two forks and add corn. A few minutes before serving, add in cooked rice, and cheese. Stir to combine. Add hot water if mixture needs thinned. Serve hot.

Serve with a green salad, fruit, bread, or a hot green vegetable.


Wednesday, January 9, 2013

Pot Roast with Red Wine and Mushrooms


Whenever I spy a chuck roast on sale at the grocery, I grab one or two. While chuck is a tough and sometimes fatty cut of meat, it can be used for a tender pot roast, or any variety of tasty stews. Cooked long and low in a tasty broth, chuck roast is one of the most comforting cuts of beef I know. The tough gets all soft and most of the fat cooks down and can be skimmed off to make gravy.

On Sunday, I had a big cut of chuck roast, a lovely bottle of gifted Italian wine and 12 or so ounces of fresh cremini mushrooms. Sounds like pot roast. I have several recipes for pot roast, but none used much wine or mushrooms, so I varied my recipe a tad. You can never have too many chuck roast recipes.

I left the "sauce" loose, choosing to just pour it instead of thickening it for gravy. The buttered polenta soaked it right up. Yum.


Pot Roast with Red Wine and Mushrooms
serves 6-8

3 or so pounds chuck roast
2 T. olive oil
salt and pepper
1 onion (sliced like an apple)
1 1/2 cups good red wine, merlot, cabernet, or a blend (mine was an Italian primitivo, similar to a zinfadel)
1 can vegetable broth
2 t. beef base or bouillon cubes
4 T. or so tomato paste or ready-made tomato sauce
1 T. Dijon mustard
1 T. Italian seasoning (herbes de provence would work, too)
5 cloves garlic, peeled and smashed

8-10 carrots
2 stalks celery, sliced
8-12 ounces cremini mushrooms  sliced or quartered (if you have mushrooms detectives, just quarter them so they can push them aside)


Preheat oven to 325 degrees F.

Heat a large dutch oven over medium high heat. Add oil and heat. Season roast with salt and pepper and place, seasoned side down, in oil. Season other side. Cook until lightly browned, and turn, cooking other side until lightly browned. Turn heat down to medium and add onions. Stir and let cook five minutes or so. Pour the wine and broth over roast. Stir in beef base, tomato paste/sauce, mustard and seasoning. Add garlic cloves. Bring to a simmer. Cover and place in 325 degree oven. 

Cook for two hours until roast is beginning to fall apart.

Add carrots, celery and mushrooms. Cook for 30-45 minutes until vegetables are tender.

Remove meat from sauce. Break up into serving-size pieces. Remove vegetables to a bowl or platter and keep warm with roast. Strain sauce and skim some of the fat off.  Season to taste. Serve in a gravy bowl with ladle.

Serve with mashed potatoes, hot noodles, or a bowl of steaming buttered polenta. Yum.


Friday, July 6, 2012

BBQ Beef Brisket


I have so many recipes to share with you, I don't know where to start. I have lost my oomph here and I don't know how to get it back. Do you ever feel that way about something? Something you previously enjoyed and then just suddenly didn't really care to do anymore. I did that with scrapbooking a couple years ago, but I really just replaced it with another craft. I am still cooking, I just can't muster the excitement to put the recipes here. And I just don't know what to do.

While I'm still figuring it all out, I'll try to share some really good recipes that I have made lately.

I made this Beef Brisket on the Fourth and it was a huge hit. We had 10 people for dinner and we polished off all but a tiny bit of three whole briskets. The college kid took the rest home. It was that good. Everyone loved it. My only complaint was that it was a tad dry, but no one else complained. I think the next time I'll whip up some homemade BBQ sauce to drizzle over the top. It tasted very barbequey (not a word) but wasn't saucy.

The recipe came from Pots and Pins (with a funny story about her husband), and I followed it almost to a T except it turns out there is Heinz 57 Sauce and Heinz 57 Steak Sauce. I used the sauce sauce and not the steak sauce. But it was good, so why mess with a good thing? Also, since I was cooking three briskets, I doubled the rub, but not the sauce. Maybe next time I need to make more sauce.


 57 Beef Brisket

1 brisket (6 lbs.), fat slightly trimmed
2 T. brown sugar, packed
1 T. salt
1 T. onion powder
1 T. garlic powder
1 T. ground dry mustard
1 T. smoked paprika (I used sweet paprika)
1 T. ground black pepper
1 bottle (10 oz.) Heinz 57 Steak Sauce (or sauce sauce, whichever is handy)
1/4 cup liquid smoke 
1/4 cup Worcestershire sauce


In a small bowl combine brown sugar, salt, onion powder, garlic powder, dry mustard, paprika and pepper.  Rub the mixture all over the brisket, both sides.  Put brisket in baking dish, fat side up and cover with plastic wrap and refrigerate overnight. 

In the morning, take brisket from refrigerator.  Preheat oven to 300 degrees. In a small bowl combine Heinz 57 Steak Sauce, liquid smoke and Worcestershire sauce.  Pour over brisket.  

Cover baking dish with aluminum foil.  Bake in 300 degree oven for 7 to 8 hours.  Allow to sit for 15 minutes on counter before slicing.  Slice against the grain.  

Note: I roasted mine in an electric roaster that I plugged in down the basement so the house wouldn't heat up. 


Tuesday, June 26, 2012

Fish Tacos with Lime Cilantro Crema


I'm joining Sarah and Pam today to share the best of my time spent online.

It's funny, since I got a Kindle Fire for Christmas, I definitely spend more time online. But it feels like I spend less time online, because I rarely sit at the computer with my back to my family. I think there is something to be said about that. When I am online, I am usually at the kitchen table or in a chair in the living room, facing my family and open to their needs and conversation. I used to feel guilty about being online because I was facing the computer and my family saw my back. I did not feel like I could adequately see what was going on with my children, or take care of meals, while I was online. Now, I can carry "online" around with me, or leave it sit and do what I need to do without feeling like I am peeling myself away from the screen.


Anyway, that brings me to this recipe, which I saw one day recently while I was surfing. I love fish tacos, and whenever I eat out and fish tacos are on the menu, I get them. But I have never fixed them at home. This recipe changed that because they were so simple and delicious, I can make them any time.

I omitted the coriander from the rub for the fish because I detest it. I love cilantro, however, and definitely added the full quarter cup to the Lime Crema. The sauce really made this dish special even though it was so simple to throw together. We topped our fish with the sauce and shredded red cabbage and enjoyed some spicy Peppercorn on the side. I was unable to get red snapper in Columbus, Ohio, which I figured would be the case, so I subbed catfish, which is an equally mild and medium-firm fish. It was great and cheap and available.


Fish Tacos


Crema:
1/4 c. thinly sliced green onions
1/4 c. chopped fresh cilantro
3 T. mayonnaise 
3 T. sour cream
1 t. grated lime rind (I did not use this)
1 1/2 t. fresh lime juice
1/4 t. salt
1 garlic clove, minced


Fish:
1 t. ground cumin
1/2 t. smoked paprika
1/4 t. ground red pepper
1/8 t. salt
1/8 t. garlic powder
1 1/2 pounds red snapper fillets (or catfish or another mild, white, medium-firm fish)


8 (6-inch) corn tortillas
2 cups shredded cabbage 


Preheat oven to 425°.
To prepare crema, combine crema ingredients in a small bowl; set aside.

To prepare tacos, combine spices in a small bowl; sprinkle spice mixture evenly over both sides of fish. 
Place fish on a baking sheet coated with cooking spray. Bake at 425° for 9 minutes or until fish flakes easily when tested with a fork or until desired degree of doneness. 

Place fish in a bowl; break into pieces with a fork. Heat tortillas according to package directions. Divide fish evenly among tortillas; top each with 1/4 cup cabbage and 1 tablespoon crema.

Monday, June 18, 2012

Lidia's Polenta


During the hot summer months I don't often make a dish that requires a long, slow simmer on the stove. Not only does a long, slow simmer heat up the kitchen, but those heavier meals are often too heavy for hot weather (even when the house is air conditioned). Occasionally, however, a simple meal like polenta and sauce is a nice dish to enjoy on a rainy summer day -- one like this recipe for Lidia's Polenta.

Polenta is a simple dish to prepare, and paired with a really good jarred pasta sauce (or some homemade sauce you stashed in the freezer) and some sauteed Italian sausages, a tasty treat even for a summer evening.

On the evening we ate this meal, I browned some fresh Italian sausages in some olive oil in a large skillet, opened a jar of Tyler Florence's Vodka sauce, poured it over the sausages and simmered them for a half hour or so. Then I sliced the sausages and served them, with the sauce,  over a spoonful of this wonderful polenta, with Parmesan cheese. Simple and delicious (and inexpensive).

I omit the bay leaves when I make it, but other than that, I make it as written.

Lidia's Basic Polenta


2 c. milk
2 c. water
1 T. unsalted butter
1 bay leaf (optional)
2 T. coarse salt (I start with less until I taste it)
1 1/2 c. coarse yellow cornmeal (or polenta if you can find it labeled as such)

In medium saucepan, combine milk, water, butter, bay leaf and salt. Heat to simmer over medium flame. Slowly sift cornmeal into pan through fingers of one hand, stirring constantly until polenta is smooth and thick and pulls away from sides of pan when stirred, about 20 minutes. Discard bay leaf.


Thursday, June 7, 2012

Hot dogs and potatoes


From one day to the next I never know how dinner is going to be received in my house. That can be a frustrating thing. You go to all that work and then the kids stick their noses up at it. Not that they are permitted to be rudely critical, but if they don't eat, then that's a pretty clear criticism.

I can take the criticism, but I hate wasted food. Period.

I also hate to fight over food, so I gave up a long time ago making kids sit at the table until their plate is clean. My sanity is more important than my pride.

Anyway...short story long, the other day I was asked, as I am every day, "What's for dinner?" When I said, "hotdogs and potatoes," I was met with mixed comments. I told them all to "Shut it" and they could eat it or not. They all ate it. It was good, simple, and really easy to make food.

The bottom line is, kids like hotdogs (and I use good beef hotdogs) and fried potatoes (and just dice the onions really small and encourage them to cover it in ketchup -- hey, it has lycopene!). So what's not to like? Serve some fresh fruit on the side, like sliced watermelon, or bing cherries, and some yummy buttermilk biscuits with strawberry jam. It's a good, easy meal. And it's cheap. Yey.


Hotdogs and potatoes

oil for frying (I use canola for this dish)
one large white Idaho potato for each person, peeled, halved lengthwise and sliced across in 1/4 inch pieces.
1 to 2 T. minced onion for each person
1 to 2 sliced hotdogs for each person
salt and pepper

In a large skillet (non-stick or cast iron, I use non-stick for easy clean up) heat oil over medium high heat. 

When oil is hot, add potatoes and then onions on top of the potatoes. Arrange them in a single layer (or as close as possible) and them leave them alone for about five minutes. Toss the hotdogs on top and then stir, attempting to get the potato pieces flipped over. Cook for about 30 minutes, until potato pieces are tender and everything is lovely and browned.


Tuesday, May 15, 2012

Mongolian Beef and Sesame Green Beans


This recipe has become a regular at our dinner table. It's easy -- you can easily put it together in under 30 minutes, in less time than it takes for the rice to cook  -- and the flavors are a winner with all my family. The recipe is modified from Cooking Light.

The Sesame Green Beans are a recipe I have been making for years. I first ate them at my friend Gina's house and all my kids eat them. They are a great side with the Mongolian Beef and steamed white rice.


Mongolian Beef
serves 4-6


2 T lower-sodium soy sauce
1 t sugar 
1 t cornstarch
2 t dry sherry
2 t hoisin sauce
1 t rice vinegar
1 t chile paste with garlic (I use Sriracha)
1/4 t salt
2 T vegetable or peanut oil
1 T minced peeled fresh ginger
1 T minced fresh garlic
1 pound sirloin steak, thinly sliced across the grain 
8 medium green onions, cut into 2-inch pieces 


Combine first 8 ingredients, stirring until smooth.

Heat peanut oil in a large nonstick skillet over medium-high heat. Add minced ginger, minced garlic, and beef; sauté for 2 minutes or until beef is browned. Add green onion pieces; sauté 30 seconds. Add soy sauce mixture; cook 1 minute or until thickened, stirring constantly.

Serve over white or brown rice.


Sesame Green Beans

1 pound green beans, ends trimmed and washed
1 T. vegetable oil
1 t. sesame oil
1 t. sesame seeds
1/2 t crushed red pepper
salt to taste


Cook green beans in hot water until just tender (or if you are using a rice cooker with a veggie basket use that - that's what I do). Drain and set aside until serving time.

Just a few moments before serving time, heat vegetable oil in a skillet. Add beans and cook on high heat for several minutes tossing a few times. Add sesame seeds and crushed red pepper. Drizzle with sesame oil and salt to taste.


Wednesday, April 25, 2012

Cap'n Crunch Chicken

I have had some busy weeks creating rosaries and scapulars, but today my little chick is sick on the sofa so I am spending exactly one hour, not a minute more, catching up here as much as I can.


This recipe we have already had twice since I first discovered it and it's a big, big hit. Faith asked me the other day (on our second go-round) why it is that the chicken doesn't taste like Cap'n Crunch, and I guess I didn't have a very good answer. It just doesn't. The breading is crisp and slightly sweet, but nothing like a bowl of the Cap'n. The panko, flour and seasoning mellow it out I guess. I turn my oven on warm so that as I fry, I can place them on a rack over a pan until all the pieces are cooked. We easily eat two packages of chicken tenders. And speaking of which, I buy the chicken tenders because they are no more expensive than the boneless breasts, and that saves the step of cutting the strips (I multiply the breading times 1.5 for two packages of chicken). Besides the tenders are really tender and I cut time off the marinating step.

These are great with garlic mashed potatoes or mac and cheese, and definitely make the honey mustard. Yum.

Cap'n Crunch Chicken

vegetable oil for frying
2 skinless chicken breast fillets (or a package of chicken tenders)
1 cup buttermilk
1 egg
2 cups Cap’n Crunch cereal
½ cup panko bread crumbs
½ cup Wondra flour
½ teaspoon onion powder
½ teaspoon garlic powder
½ teaspoon salt
¼ teaspoon white pepper

Creole Mustard Sauce:
2 tablespoons Grey Poupon Dijon mustard
3 tablespoons mayonnaise
1 teaspoon yellow mustard
1 teaspoon honey
Mix together and chill in refrigerator.

Cut each chicken fillet, lengthwise, into 5 long slices pounded flat (chicken fingers). Put in a bowl, cover with buttermilk, and marinate overnight. Just before breading, mix in an egg to the marinade. Smash the Cap’n Crunch into crumbs using a food processor, or put the cereal into a plastic bag and start pounding. Combine the cereal, crumbs, flour, onion powder, garlic powder, salt, and pepper in a medium bowl. Remove chicken from milk and completely coat it with the dry mixture. Discard leftover milk. When the oil is hot, fry the chicken for 4 to 6 minutes or until golden brown and crispy. Remove to paper towels or a rack to drain. Serve hot with chilled Creole mustard sauce on the side for dipping. 

Wednesday, April 18, 2012

Rumbi Rice


We had a very fast spring break last week -- it seemed like I blinked and it was over, and now we are having re-entry. It's so much harder to get into life after a break -- it makes me wonder if it's worth it...but the free time is so wonderful.

I have a backlog of recipes to share with you here. This one was a big hit, which is rather odd since it is veggie-packed. I saw the recipe at a new-to-me favorite website "Favorite Family Recipes." It's called Rumbi Rice and is apparently a popular dish at a popular restaurant in Utah. I've never been to Utah, and thus not the restaurant, but it just looked like a yummy dish with a funny name. 

I made it exactly as directed, using my rice cooker for the rice (good rice), except when it came to the Hawaiian sauce (Mr. Yoshida's). This sauce is an unknown in my neck of the woods, so I used Kikkoman which was super duper salty. I used the Hawaiian sauce sparingly, but the kids and my husband did not, and they had a hard time finishing their meals. I would highly recommend making a homemade teriyaki if you are not able to get a low-salt version, or using the sauce very sparingly. Oh...and I left out the celery (reluctantly) because of my celery haters.

And, by the way, I think it would be just as good without the chicken. My family disagrees.

This served my five with leftovers.

Rumbi Rice

1 T. vegetable oil
4 carrots, peeled and grated
3 celery stalks, washed and sliced
1 zucchini, chopped into small cubes
1 1/2 c. chopped broccoli florets
2 c. chicken, grilled and cut into small cubes

*Rumbi Rice (see recipe below)

**Spicy Hawaiian Teriyaki Sauce (see recipe below)

Heat vegetable oil in a large skillet over medium-high heat. Add carrots, celery, zucchini, and broccoli (pretty much equal parts of said vegetables.. you can add more or less veggies depending on your taste). Saute ONLY until vegetables are crisp tender. About 1-2 minutes tops.

Serve over Rumbi rice and top with chicken. Serve with Spicy Hawaiian Teriyaki Sauce on the side (about 3 Tbsp. per bowl.. you can add more or less depending on your taste).


*Hawaiian Coconut Rice with Red Beans (aka Rumbi Rice)
2 c. long grain white rice
2 1/2 c. water
1 (14oz) can coconut milk (about 1 1/2 c.)
1/2 Tbsp. sugar
1 can red beans, drained and rinsed

Combine all ingredients in a rice cooker. Gently stir it all together so the beans are all mixed. Place the lid on and start the rice cooker. Fluff rice with a fork before serving.
If you don’t have a rice cookerCombine water, coconut milk, and sugar in a saucepan. Stir in rice and beans. Bring to a boil over medium heat. Cover, reduce heat, and simmer 18 to 20 minutes, until rice is tender. 


**Spicy Hawaiian Teriyaki Sauce:
3/4 c. Mr. Yoshida’s teriyaki sauce
1 t. soy sauce
2 tsp. chili garlic sauce (Sriracha)
1 tsp. fresh ginger
pinch of salt
pinch of brown sugar
1 T. cornstarch
2 T. cold water
Combine Yoshida’s, soy sauce, garlic sauce, ginger, salt, and brown sugar in a small saucepan. Bring to a boil and then reduce to a simmer. Combine cornstarch and water and SLOWLY add to sauce for thickening. You want it to be slightly thicker than the Yoshida’s sauce. Allow to simmer for about a minute. Cool to room temperature and serve with your rice bowls.


Printer version


Friday, March 23, 2012

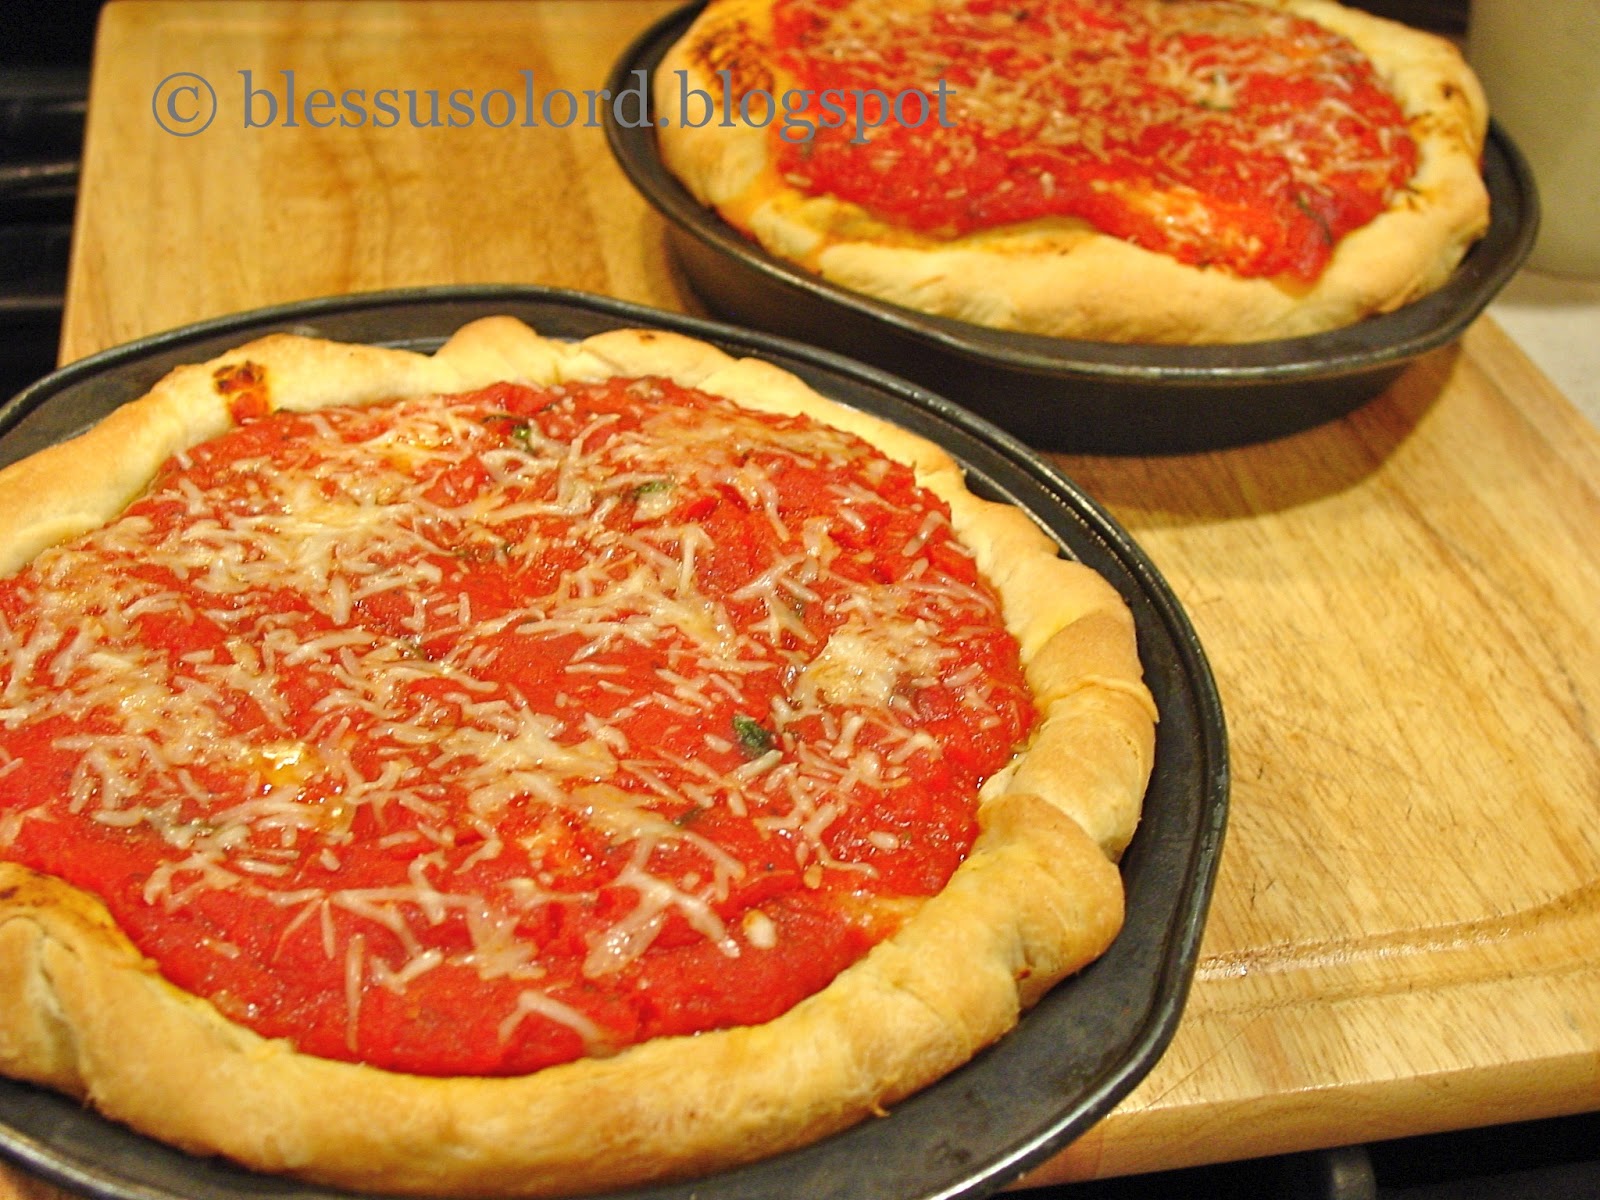
Chicago Style Pizza

One of my lovely readers noticed my absence lately (hi Linda!). I was wondering if anyone was still reading and I am glad to know that one reader is still hanging on.

I tease...and yet. Really. It's kinda lonely in here.


A couple weeks ago my mom and I made a trip with my daughter to Chicago, to the American Girl store. Yes, we drove six and a half hours one way just to take her to the American Girl Sore. For her birthday. Once in a lifetime kinda thing.

I was really disappointed that we never got any Chicago-style pizza while we were there. I was actually really disappointed that we had one good meal the whole time we were there, and that was breakfast, but that's another story. As luck would have it the Monday after we got home the Brown-eyed Baker featured Chicago style pizza. It took about .00001 seconds for me to decide that I needed to make Chicago style pizza for dinner.

Thanks to the Brown-eyed Baker I never have to go to Chicago again (because now the AG store is off the bucket list). This recipe was very easy to follow and it was delicious pizza! My boys love, loved it, and I think it will be making an appearance here often. The dough might look complicated, but it's not. It's easy as...pie.

I think my one mistake was to use shredded Parmesan instead of grated. I think we needed grated, although no one complained.  Next time I will use grated. Also modified -- I used a couple tablespoons of sugar instead of the 1/4 teaspoon Michelle used. We like sweet sauce.


Chicago Style Pizza
makes 2 pizzas

For the Dough:
3¼ c. all-purpose flour
½ c. yellow cornmeal
1½ t. salt
2 t. sugar
2¼ t. instant yeast
1¼ c. water, room temperature
3 T. unsalted butter, melted
4 T. unsalted butter, softened
1 t. + 4 T. olive oil, divided


For the Sauce:
2 T. unsalted butter
¼ c. grated onion
¼ t. dried oregano
½ t. salt
2 garlic cloves, minced
1 (28-ounce) can crushed tomatoes
¼ t. sugar ( I used at least 2 T.)
2 T. coarsely chopped fresh basil
1 T. olive oil
Freshly ground black pepper


For the Toppings:
1 pound mozzarella cheese, shredded (about 4 cups)
(Pepperoni)
¼ c. grated Parmesan cheese


 Make the Dough: Whisk together the flour, cornmeal, salt, sugar, and yeast in a large bowl. Add water and melted butter and mix on low speed, using a dough hook, until fully combined, 1 to 2 minutes, scraping sides and bottom of bowl occasionally. Increase speed to medium and knead until dough is glossy and smooth and pulls away from sides of bowl, 4 to 5 minutes. (You can easily make this by hand, mixing in the water and butter with a spatula and then kneading by hand.)

Coat a large bowl with 1 teaspoon olive oil. Using greased spatula, transfer dough to bowl, turning to coat the dough in oil; cover tightly with plastic wrap. Let rise at room temperature until nearly doubled in volume, 45 to 60 minutes.


 Make the Sauce: While dough rises, heat the butter in a medium saucepan over medium heat until melted. Add onion, oregano, and salt; cook, stirring occasionally, until liquid has evaporated and onion is golden brown, about 5 minutes. Add garlic and cook until fragrant, about 30 seconds. Stir in tomatoes and sugar, increase heat to high, and bring to a simmer. Lower heat to medium-low and simmer until reduced to about 2½ cups, 25 to 30 minutes. Off the heat, stir in the basil and olive oil, then season with salt and pepper.


 Laminate the Dough: Turn the dough out onto dry work surface and roll into a 15×12-inch rectangle. Using an offset spatula, spread the softened butter over the surface of the dough, leaving a ½-inch border along the edges. Starting at the short end, roll the dough into a tight cylinder. With seam side down, flatten the cylinder into an 18×4-inch rectangle. Cut rectangle in half crosswise. Working with one half, fold into thirds like a business letter; pinch seams together to form ball. Repeat with remaining half. Return balls to oiled bowl, cover tightly with plastic wrap, and let rise in refrigerator until nearly doubled in volume, 40 to 50 minutes. Meanwhile, adjust oven rack to lower position and preheat oven to 425 degrees F.

 Bake the Pizzas: Coat two 9-inch round cake pans with 2 tablespoons olive oil each. Transfer 1 dough ball to dry work surface and roll out into a 13-inch circle. Transfer dough to the pan by rolling the dough loosely around a rolling pin and unrolling into pan. Lightly press dough into pan, working into corners and 1 inch up sides. If dough resists stretching, let it relax for 5 minutes before trying again. Repeat with remaining dough ball.


 For each pizza, sprinkle 2 cups mozzarella evenly over surface of dough. (If you’re using any meat or veggie toppings, add them now, on top of the cheese.) Spread 1¼ cups tomato sauce over the cheese (or toppings) and sprinkle 2 tablespoons Parmesan over sauce. 


Bake until crust is golden brown, 20 to 30 minutes. Remove pizza from oven and let rest 10 minutes before slicing and serving.

Source: Brown-eyed Baker

Friday, March 9, 2012

Goulash


Pin It


I have a memory from my childhood of a food my mother called goulash. We are part Hungarian and so I always thought it was authentic goulash, except every goulash I have ever eaten since really tastes nothing like it. My mother has no recollection of this goulash so I can't compare recipes. It looked like authentic goulash (to my memory) but was much sweeter, almost like a barbecued beef. I tried this recipe for Beef Goulash from Tastes Like Home Cooking and it was not exactly the goulash from my memory, but it was really good. My husband loved it and even the kids ate it (except one picked out the onions, ugh). I will definitely make this recipe again -- it's easy and budget-friendly. It's been a couple weeks so my memory is fuzzy, but I'm pretty sure I added about a tablespoon of sugar to it, so I am listing that in the ingredients. Can't hurt, right?


Beef Goulash
serves 5-6

1 1/4 pounds chuck roast, excess fat trimmed, cut into large cubes
2 T. vegetable oil
1 medium onion, sliced
2 cloves garlic, chopped
1 1/2 T. paprika (use the good stuff or another good Hungarian paprika)
15-oz can diced tomatoes
1 T. tomato paste
2 t. flour
2 cups beef broth, divided
1 T. dried thyme
1 T. sugar
salt and pepper to taste
egg noodles, cooked according to package directions
sour cream for topping

Preheat oven to 325 degrees. Heat oil in a oven safe casserole dish and add beef, cooking until brown. Add onions and garlic, and cook until onions are transparent. Add paprika and stir.

Add tomatoes and tomato paste. Dissolve flour in 1 cup beef broth and add to pot. Add thyme and sugar, then salt and pepper to taste. Bring to a boil, stirring often.

Cover tightly and place in oven. Cook for 1 hour. After an hour, if the mixture looks dry, add another 1 cup beef broth. Cover and cook an additional hour. Serve with egg noodles and a dollop of sour cream.
 

source: modified slightly from Taste of Home Cooking


Sunday, February 19, 2012

Steak with Salsa Verde

It's been rather quiet around here. I can't tell if you're not reading, not cooking, or just not talking. I have been trying a variety of recipes here, so hopefully one if these days I'll hit on something that interests you.


Today's recipe is another Jamie Oliver recipe, and my family loved it -- six out of six thumbs up. They love beef, and they love spicy, bold flavors, and I love that all the ingredients were whole, fresh foods. Unfortunately, Jamie jinxed me when he wrote "watch your fingers here" in regard to chopping the salsa ingredients, because I cut the begeebers out of my left index finger. Fortunately, the salsa was pretty well finished when I did it. And fortunately, my little sous chef was perfectly able to prepare the salad.

This is a good, healthy, budget-conscious recipe, with the flank steak, and will be even more so during the summer when veggies are growing in the garden.

Steak with Salsa Verde

1-pound flank steak (I used an almost 2-pound steak for six of us)
1/8 t. sea salt
Freshly ground black pepper, to taste
1 T. olive oil
1 clove garlic, halved

For the salsa verde:
a small bunch of fresh cilantro
a small bunch of fresh mint, leaves picked
1 clove garlic, peeled
1 to 2 fresh jalapeno or serrano chiles, seeded (I used one large jalapeno)
4 large scallions, trimmed 
2 tomatoes, roughly chopped 
freshly ground black pepper, to taste
juice of 1 to 2 limes (I used one)
1 T. olive oil
1/8 t. salt

Jamie's Note: Make sure your meat is at room temperature before you start cooking – that way it will cook at the same temperature all the way through.

It’s really important to rest the meat once it’s cooked. It allows the juices to settle, so you don’t lose them all when you slice or carve the steak.

Method 

Take your steak out of the refrigerator and let it get up to room temperature while you make your salsa.

Get yourself a good knife and a big cutting board. Set aside a few of the cilantro leaves, then chop the top of the bunch, stalks and all, with the mint leaves, garlic, chiles, scallions, and tomatoes until it’s all very fine – watch your fingers here! Sprinkle over a pinch of the salt and pepper, then add most of the lime juice and a good lug of extra virgin olive oil. Mix together on the board, taste it, season with the remaining salt, pepper, lime juice, or chile, and put it into a bowl ready to go.

Get a frying pan, grill pan, or outdoor grill screaming hot and season both sides of your steaks with the salt, pepper, and a good lug of olive oil (we grilled it on the gas grill).

Add the steaks to the pan or grill. Your steaks should take about 6 to 7 minutes per side to cook depending on how you like them. As it cooks, rub the steak with the cut side of the garlic clove for some extra flavor.

When the steaks are perfectly cooked to your liking, move them to a plate to rest for a few minutes.

Cut the flank against the grain and with the knife at an angle to the board into 1/4-inch-thick slices, and arrange them on a large serving platter or divide between your plates.

Finish with a few dollops of salsa, and scatter over your remaining cilantro leaves. Drizzle over any resting juices and let everyone tuck in.

Source: Jamie Oliver

Friday, January 13, 2012

Budget soup


I don't like to use the word "budget" because I think it has negative connotations, but I am also one who calls a spade a spade. This is budget soup. The ingredients are inexpensive to buy, and when feeding a large family that's something.

Though it is far from haute cuisine, it is most edible, and, in fact, quite tasty, and I would definitely make it over and over. I found the recipe after a friend told me she had purchased a jar of soup ingredients at a holiday craft sale. She mentioned the name of the woman who put the soups together, and I remembered that I had seen this same person's recipe in a school cookbook. The recipe was originally created to assemble a jar of it and give it someone else. The only thing the jar needs in addition to the ingredients in the jar, is a pound of ground meat and a can of tomatoes. I never assembled it in a jar, just measured the ingredients as listed and dumped them in a pot.


The leftovers were great for lunch on the go.


The recipe gives the option of using chili powder for seasoning or Italian seasoning. I used my own combination of Italian herbs, shown below. I did not have barley or split peas when I made it so I subbed more lentils for the peas and more rice for the barley. I also used all star shaped pasta instead of the recommended ABC pasta and additional shaped pasta. I wouldn't mind using the other ingredients, but it's all grain and I think you would be fine with almost any combination.

I ate the leftovers for lunch several days later (as well as took two jars to my neighbors) and it was a little more like stew left over -- the grains swelled and absorbed the broth. You could add more broth or another can of tomatoes, but it was really very good like that.


Budget Soup
(aka Love Soup -- I guess for when you are giving it away)

1/3 cup beef boullion or soup base (see note)
1 T. chili powder OR 1 1/2 T. Italian seasoning (see note)
1/4 cup onion flakes (see note)
1/2 cup split peas
1/2 cup ABC macaroni
1/4 cup barley
1/2 cup lentils
1/2 cup rice
pasta (any shape)

1 pound ground meat (I used ground chuck)
1 can chopped tomatoes (see note
salt and pepper

To give away in a jar: Layer ingredients, in order listed, in a 1-quart jar. Use shaped pasta to fill the top. Close jar with a ring and cap. Add preparation instructions on a tag.

To prepare: brown 1 lb ground meat ; drain.
Reserve shaped pasta to add later. Add remaining ingredients to beef and add 12 cups water. Add can of tomatoes with juice. Simmer for 45 minutes. Taste and season. Add reserved pasta and cook until pasta is tender, 10 to 15 minutes, Serve.

Notes: 
If you prefer not to use soup base, you can use beef broth, but that will raise the cost. You'll also have to adjust seasoning. 

For Italian seasoning, use equal amounts of dried basil, oregano, thyme, rosemary and marjoram to equal 1 1/2 tablespoons.

I used 3 T. onion powder instead of onion flakes.
The recipe called for 28 oz. of tomatoes, however to reduce acid I used a 14 oz can with fine results. Use whatever suits your taste.

Meat can be left out for vegetarian soup.


Source: St. Paul School cookbook

Friday, January 6, 2012

Jamie's Chicken Chow Mein


I have a recipe for Chicken Chow Mein in my cookbook, and it's a good recipe, but after trying Jamie Oliver's version for dinner the week, I'm afraid I'll never make my old recipe again. This recipe was the epitome of what I am looking for in meals this year. It was easy. It was delicious. But best, it was made with simple and whole ingredients, getting most of the flavor from fresh vegetables, herbs, and citrus, with no jarred sauces (except soy). The flavors, unlike most in Chinese/American were bright and fresh and definitely a little spicy. I used the recipe as written on Jamie's website and modified just a little (subbed red pepper flakes for a whole red Chili unavailable at my grocer). I also doubled it for four of us with just a little bit leftover. You could get two adult and three or four child servings from the recipe below. I think in the future I will sub some fresh veggie (like snap peas) for the water chestnuts, but mostly because my kids are not big fans of water chestnuts. I did not use the mushrooms because we have mushroom haters.

Just so you know you can cook Chinese without special equipment, I cooked mine in a large nonstick skillet.

Jamie's Chicken Chow Mein
 serves 4-5


a thumb-sized piece of fresh root ginger
4 cloves of garlic
1/2 to 1 t. red pepper flakes
2  large skinless chicken breast fillet (I used four med/small and we had a lot of chicken)
  salt and freshly ground black pepper
5 scallions
  a small bunch of fresh cilantro
1 to 2 heads bok choy, depending on how much you like it
Optional: 4 shiitake mushrooms
10 oz. chow mein noodles
  peanut or vegetable oil
1 T. cornstarch
8-ounce can of water chestnuts (or 1 cup of another quick-cooking veggie, like snow or snap peas)
4-5 tablespoons soy sauce
 1 small lime

To prepare your stir-fry
Put a large pan of water on to boil. Peel and finely slice the ginger and garlic. Place your red pepper flakes with the ginger and garlic. Slice the chicken into finger-sized strips and lightly season with salt and pepper. Cut the ends of your scallions and finely slice. Halve the bok choy lengthwise and cut crosswise into large strips. If using the mushrooms, either tear into pieces or leave whole.

To cook your stir-fry
Preheat a wok or a large frying pan on a high heat and once it’s very, very hot, add a good lug of peanut oil and swirl it around. Stir in the chicken strips and cook for a couple of minutes, until the chicken browns slightly. Add the ginger, chile, cilantro stalks, mushrooms (if using) and half the scallions. Stir-fry for 30 seconds, keeping everything moving around the wok quickly. Add your noodles and bok choy to the boiling water and cook for 2 to 3 minutes, no longer. Meanwhile add the cornstarch, water chestnuts, and their water to the wok and give it another good shake to make sure nothing sticks to the bottom. Remove from heat and stir in soy sauce (start with half and taste to see if you need more). Halve the lime, squeeze the juice of one half into the pan and mix well. Drain the noodles and bok choy in a colander over a bowl, reserving a little of the cooking water. Stir in the noodles and bok choy, with a little of the cooking water to loosen, if necessary, and mix well. Have a taste and season with more soy sauce if needed.

To serve your stir-fry
Use tongs to divide everything between two bowls or plates, or lift onto one large serving platter. Spoon any juices over the top and sprinkle with the rest of the scallions and the cilantro leaves. Serve with lime wedges.

Yum.