Merciful God, You are great in compassion and Your tenderness for us is without measure. We ask You to give us today our daily bread, and also provide for the needs of all of Your hungry children around the world. Through Christ Your Son and Our Lord. Amen.

Showing posts with label Desserts. Show all posts

Sunday, October 13, 2013

Pumpkin, Oatmeal, Butterscotch Blondies


This past weekend was a busy one for us, with mom and dad and kids going in several directions, several times. I dislike those kinds of weekends immensely, but they happen. I did manage to carve out time for a nice dinner Saturday evening, and afterward I decided a sweet treat was in order. Because I didn't start them until after dinner, I didn't want to bake cookies (and be in the kitchen for an hour), so these bars were perfect. When I asked my guys if they wanted some Pumpkin Butterscotch Bars (I intentionally left out the word "oatmeal" when I asked) they said "Nah." Huh? I decided to make them anyway, and they loved them (even after they found out there was oatmeal in them).

These little babies will definitely be an annual event.

They are a combination of several recipes, and I subbed out three-quarters of the all-purpose flour with oat flour (or blended oatmeal) because I could not find a recipe which used oats and had a blondie texture. If you are not so keen on oats, just use all-purpose flour (though I can't guarantee the same texture), and if you eat gluten-free, I bet you can use a gluten-free flour mix in place of the all-purpose.

These fell apart quite a bit when they were warm, so I should tell you to let them cool before cutting and eating, but they were so good when they were warm, I really can't tell you that. When they cooled, the butterscotch chips hardened up, so they had a bit of a crunch to them -- very different from the warm texture, but still very, very good.


Pumpkin, Oatmeal, Butterscotch Blondies
makes 20-24

½ c. oat flour (blend oatmeal in your processor or blender)
 ½ c. all-purpose flour

2 t. cinnamon *
½ t. ginger *

¼ t. ground cloves *
1 t. baking soda
½ t. salt
1 cup (2 sticks) butter, softened
1 ¼ c. granulated sugar
1 large egg
1 t. vanilla
1 cup pumpkin (not pie filling -- just pumpkin)
12 oz. bag butterscotch chips


Preheat the oven to 350° F. 

Line a 9x13-inch baking dish with parchment. 

In the bowl of an electric mixer fitted with the paddle attachment, beat the butter and sugar until light and fluffy. Beat in the egg and vanilla until well combined. Mix in the pumpkin puree (it might look curdled, but that's ok). With the mixer on low speed add the dry ingredients and mix just until incorporated. Fold in the butterscotch chips with a rubber spatula.

Spread the batter evenly into the prepared pan. Bake until a toothpick inserted in the center comes out with just a few crumbs, about 35-40 minutes. Transfer the pan to a wire rack and let cool completely before cutting (or not).

To serve, lift the cake from the pan using the parchment and transfer to a cutting board. Cut into 24 squares (I lift the paper back in the pan then, just to contain the mess).


* if you have pumpkin pie spice, you can substitute 1 tablespoon for the cinnamon, ginger and cloves.


Monday, August 19, 2013

Key Lime Pie


My now-17-year-old son, Noah, had his birthday celebration with extended family yesterday, and I baked a Key Lime Pie, at his request. This has to go down as one of the easiest, but most enjoyed pies I have ever made. The birthday boy certainly enjoyed did, but we all "yummed" all the way through our portions as well. It set up well and cut beautifully.

I found the recipe at myrecipes.com, but, of course, modified it. I think a Key Lime Pie should have whipped cream on it to counter the tart filling, so that's what I did. I also cut some of the juice out because I was afraid it would be really tart based on the reviews. Because fresh key limes are not available at any of the stores I shop in, I used fresh Persian limes (the standard kind you find at the grocer). Recipe as thoroughly enjoyed below:


Key Lime Pie

1 ¼ cups graham crackers (buy the already crushed crumbs -- it's worth it)
2 T. sugar
¼ cup melted butter
2 (14 oz) cans sweetened condensed milk
¾ cups fresh-squeezed lime juice (use key limes if you can find them, but they are usually small and you'll have to squeeze a lot!)
2 large eggs, lightly beaten
½ cups whipping cream
4 T. powdered sugar
lime zest for garnish, if desired

Preheat oven to 325°. Mix graham cracker crumbs, granulated sugar, and butter with hands; press firmly into a 9-inch pie plate. Bake at 325° for 15 minutes or until lightly browned. Remove and let stand 15 minutes.

Whisk together condensed milk, lime juice, and eggs until well blended. Pour into crust, and bake at 325° for 18 to 20 minutes or until set. Chill at least 4 hours.

Combine whipping cream and powdered sugar. Whip until cream holds its peaks. Spread evenly over pie, and garnish, if desired.


Source: modified from myrecipes.com


Saturday, July 13, 2013

St. Swithin -- the weather saint


On Monday, you'll find the feast of St. Swithin on the liturgical calendar. For a lovely summer cake to celebrate the day, pop over to Catholic Cuisine and you'll find a recipe for a delicious blueberry cake.


Monday, July 1, 2013

Kids Cook -- Rolos S'mores


I'm back, I'm back! For two weeks my entire house was upside down because we were getting new wood floors on the first level. What a mess! I have been informed by several people that it shouldn't been as bad as it was and mostly it was because the installers cut the wood pieces indoors. Why I didn't tell them to set their saw up in the garage? I have no idea. I guess I just thought that's what they do. Never again. Next time I am in charge. They came highly recommended but I think most of their work in the past has been in churches and our local seminary -- not houses!

I got my kitchen back enough to cook on Thursday. Even a homemade salad tasted so good! I am not a fan of eating out and doing that for eight days was almost torturous.

But here we are, back in cooking mode and my little sous chef has a recipe. I am thinking of starting a regular Kids Cook post, so that others can link up and the kids can post their own recipes. What do you think? Faith is game, and she'd love to make some new online friends.

This was not so much a recipe, as a pinterest nab. It's great because the kids can handle the whole thing (with parental supervision) and it can be done indoors (on a gas stove) or out -- even over the grill.


Rolos S'mores

marshmallows
graham crackers (chocolate or regular)

Hold one marshmallow in one hand and push a mini rolo into the center of the marshmallow through the flat part. Take skewer (or stick in the great outdoors) and push it through the rounded part (we do two at a time!). That part can be hard if the rolos are at all cold, so a parent might need to help push the skewer through so that no one draws blood! Roast over flame until golden brown (don't roast too long or the chocolate will ooze out) and then smash between two graham crackers.


Tuesday, October 23, 2012

Caramel Apple Cheesecake Dip


I did not realize this dish looked like a sunflower until Faith saw the picture and said so (duh!). It would be great if you had a sunflower theme. You might do a better job of arranging the apples than I did. Of course if you want it to look like a sunflower be sure and use yellow, or mostly yellow apples like I did.


It's hard to decide what to indulge in this time of year. All the wonderful harvest foods, like fresh apples and pumpkin) have so many variations, one could never get tired of them. Or at least not while the leaves are falling.

This past weekend I scheduled an appetizer night, an event my family loves where we fill our plates with the kinds of foods we don't get to eat except on the rare occasion we serve an appetizer -- very rare, I assure you. For dessert, what's better than another appetizer style dish -- dip!

This recipe turned out so wonderful, I would be tempted to eat it every day. It wouldn't be healthy to eat every day, as I can always turned something very healthy -- a juicy, fresh apple -- into something unhealthy. This time I can blame Michelle at The Brown-Eyed Baker for turning a healthy food into a sweet treat. It took less than a week after Michelle posted this recipe for me to try it. That's just about a record. The boys liked this dessert, but not as much as Faith and I did. We hovered over the plate until our bellies hurt.

I made the recipe almost like Michelle did, except I cheated and used Smucker's Caramel Ice Cream Sauce, since I was already making several appetizers for dinner. I also omitted the Heath Bits because of Noah's nut allergy. I did sprinkle the caramel sauce with sea salt, but it may have been lost in all the other flavors. I wouldn't say it was crucial. I also used two 8 oz blocks of cream cheese, for a total of 16 oz., simply because I wasn't paying attention. I would recommend using the 16 oz because when are you ever going to use up that little chunk of cream cheese left over? I also may or may not have quadrupled the amount of caramel sauce. Hey, her first name is Caramel.


Caramel Apple Cheesecake Dip
serves about 10 

16 ounces cream cheese, at room temperature
¼ cup powdered sugar
3 T. heavy cream
½ t. vanilla extract
1 cup caramel sauce, divided
2 T. Heath bits, divided
2 T. mini chocolate chips, divided
 fresh apples, cored and sliced (I used a mix of Jonagolds and Golden Delicious -- my Goldens were slightly tart)


 Line a 4-to-6-inch round pan or bowl with plastic wrap, using enough so that the excess hangs over the sides of the pan; set aside. I would suggest a bowl with a rounded bottom for a rounded top when you flip it.

Using an electric mixer on medium speed, beat the cream cheese until light and smooth, about 3 minutes, scraping the sides of the bowl as needed. Add the powdered sugar, heavy cream and vanilla extract and beat again until completely combined and smooth, another 1 to 2 minutes.

Spread half of the cream cheese mixture into the plastic wrap-lined pan, smoothing it into an even layer. Top with half of the caramel sauce, spreading it to within a ½-inch of the sides of the pan. Sprinkle with half of the Heath bits and mini chocolate chips. Refrigerate for 30 minutes.

Remove from the refrigerator and top with the remaining cream cheese mixture, spreading it in an even layer to the edges of the pan. Fold the overhanging plastic wrap over the top of the cream cheese. Refrigerate for at least 2 hours, or overnight.

When ready to serve, remove the pan from the refrigerator, pull back the plastic wrap and invert into the center of a serving plate. Remove the remaining plastic wrap. Top with the remaining caramel sauce and sprinkle with the remaining Heath bits and mini chocolate chips. Serve with apple slices. Refrigerate any leftovers.


Saturday, September 29, 2012

Oat Flour Apple Blueberry Crisp


Since I "went wheat-free" again recently, I have, for the most part avoided sweet treats. The few sweets I have baked, I have used oat flour, which I really like using. It doesn't have the same properties as wheat, by and large, but in some dishes it really doesn't matter. And it takes great -- far superior to wheat in the taste department. It doesn't create the same crumb in cookies and cakes, but in the fruit crisp it creates a perfect "crisp" on top of a bed of lovely fall fruit.

I decided to add a cup of blueberries to my apple crisp because a) I love blueberries in anything, and b) I had them in the fridge and they needed to get used. You could certainly go sola malum (a rough translation of "only apple" in Latin), but I do love the combo of apples and berries. I checked with my youngest son who has peanut and tree nut allergies to see if he had any intention of enjoying my crisp, and he responded "I hate blueberries." Gasp! Blaspheme! Anyway, I added walnuts because I knew he wouldn't even be tempted. They were a wonderful addition.

If you are not watching your calories, enjoy a scoop of vanilla ice cream on top of this crisp right out of the oven, and if you are, just drizzle with half & half. {wink}

I create my own oat flour with old-fashioned oats and the food processor. It makes a rather texture flour. If you prefer a smooth flour, by a certified gluten-free oat flour, and, of course, wheat-free oats.


Do you see how the ice cream melts and becomes one with the apple crisp? Yum. Half & half does the same thing. Yum, yum.


Oat Flour Apple Crisp
serves 6

3/4 cup oat flour
1/4 cup sugar
1/4 cup light brown sugar
1/2 t. cinnamon
1/8 t. salt
4 T. salted butter
3 T. coconut oil (solid)
1/3 cup old-fashioned rolled oats
1/2 cup roughly chopped walnuts
5 medium sweet-tart apples, peeled, cored and diced
1 cup fresh or frozen blueberries (if using fresh, rinse)
juice of 1/2 lemon
1/4. sugar

Preheat oven to 350 degrees F.

In an 8 x 8 glass plan, place apple pieces and rinsed blueberries. Squeeze lemon juice into pan and sprinkle with 1/4 cup sugar. Toss gently.

In a medium bowl, place oat flour, first two measures of sugars, cinnamon and salt. Add butter and coconut oil. Cut butter and coconut oil into flour with fingers or fork. Add oats and walnuts, and toss to combine. Sprinkle topping over fruit and bake for 45 to 60 minutes until fruit is bubbly and tender. Serve immediately with ice cream or cool. Refrigerate leftovers.

Printer version


Wednesday, September 5, 2012

Creamy Blueberry Tarts


Last week I had plans to take dinner to a really dear friend who recently discovered she has breast cancer. Sharing a meal with a friend is always nice, but sometimes it's just an absolute necessity. I love to be able to cook for people I care for, and as I explained to my dear friend, who has always been a giver and never a receiver, there is grace on both sides, and sometimes being a receiver is a lot harder than being the giver. She is going to have to practice being a gracious receiver (though she is always more than gracious), because inside I think she probably really hates to have to just sit and take. (Love you, Gina)

I wanted to make a sweet treat for their dessert, but her children are at college, so I didn't want to take a whole pie or cake for just her and her husband. I saw some tiny tarts somewhere recently and they looked so cute and personal, I decided to create my own. I started with a shortbread cookie, which was easy to roll out quickly and bake. The bonus was with it being small, it cooled quickly. Then I topped it with a slightly lemony, cream cheese and whipped cream combination. On top of that, fresh blueberries. You could use any fresh fruit, except maybe apples and melon. I love berries because they don't turn like peaches. Blueberries happen to be my fave and I really like that they don't "juice" all over, like sliced strawberries.

This recipe makes 6 individual tarts, but you can double it with no trouble. Also, you can leave out the lemon juice for a less tart cream. Just an FYI, I keep an opened box of instant vanilla pudding in the pantry for stabilizing whipped cream.

I wouldn't top them with the cream more than a couple hours ahead. I delivered dinner early in the day and Gina didn't mention that the cookie got soft, but just to be on the safe side, wait until a couple hours before serving. I topped my own tart right before I ate it and the cookie was, obviously, still crunchy. It was delightful.

NOTE: Gina reported that the cookie did not get soggy and I topped them with cream a good six hours before they ate them.


Creamy Blueberry Tarts
makes six

1/2 c. butter (no substitutes)
1/2 c. granulated sugar
1 1/4 c. flour (I used half oat flour for a little healthiness)
1/2 cup whipping cream
2 T. instant vanilla pudding
3 oz. cream cheese, softened 
1/4 cup powdered sugar
2 t. lemon juice
1/2 - 3/4 cup blueberries, washed and dried

Cream sugar and butter until fluffy. Add flour and mix until blended. Roll out dough to 1/4-inch on floured surface. Cut with round cookie cutters, or, in a pinch, a floured glass. Place on baking sheet and bake at 325 degrees for 20 minutes. Do not let brown.

Remove cookies to rack and let cool.

Meanwhile, whip cream with sugar and pudding until the cream holds soft peaks. Add cream cheese and whip until smooth and creamy.


Once the cookies have cooled completely, spoon several tablespoons of the whipped cream mixture over the top (just split up the cream amongst all the cookies), and then top with blueberries.


Friday, August 24, 2012

Mexican Puppy Chow


Before I get started, I have to beg technical help from any of my readers that might navigate blogger with less trouble than I do. I used to be able to figure these things out, but medication has either made my brain foggy or blogger is getting more difficult to navigate.

I changed my photo at the top of this blog and now my blog title needs to be a different color. Trouble is I can't figure out where to do that -- I think blogger switched things. If you know where to make the changes, take pity on me and leave a comment. Thanks.


Puppy Chow, that yummy peanut butter, chocolate, crunchy cereal treat, is one of the snack foods that my kids have never enjoyed, since one of them, my youngest son, has a peanut and tree nut allergy. Not that anyone ever needs to enjoy Puppy Chow, but it is an easy-to-make, tasty treat.

Recently I came across a cinnamon version of the original treat and I was so happy that I would finally be able to make it for my kids. My allergic kid was particularly happy with the new version because he is a cinnamon kinda guy. I modified the recipe I found, mostly because I only had half of a bag of cinnamon chips, but I also think this version has to be better because it has chocolate, hence the name. Mexican chocolate is a cinnamony chocolate and this one has a great combination of both flavors.

If you buy gluten-free cereals, this is a gluten free snack.


Mexican Puppy Chow

9 cups Chex cereal (I used 4 cups of corn and 5 cups of rice Chex -- just the store brand)
1 cup milk chocolate chips
1 cup semi-sweet chocolate chips
1/4 cup granulated sugar
1 t. cinnamon
1/2 cup powdered sugar

Place cereal in a large bowl -- larger than you think you need because you have to toss it.

In a microwave safe bowl place all the chips and heat in micro for one minute. Stir. Repeat, heating for 30 seconds each time and stirring after each heating, until smooth and melted.

Meanwhile mix cinnamon and sugars in a small bowl.

Pour chocolate/cinnamon mixture over cereal and toss until coated. 

Pour about half of sugar over the top and toss some more.

Dump mix onto a large sided baking sheet. Toss with remaining sugar. Cool and enjoy.


Wednesday, August 8, 2012

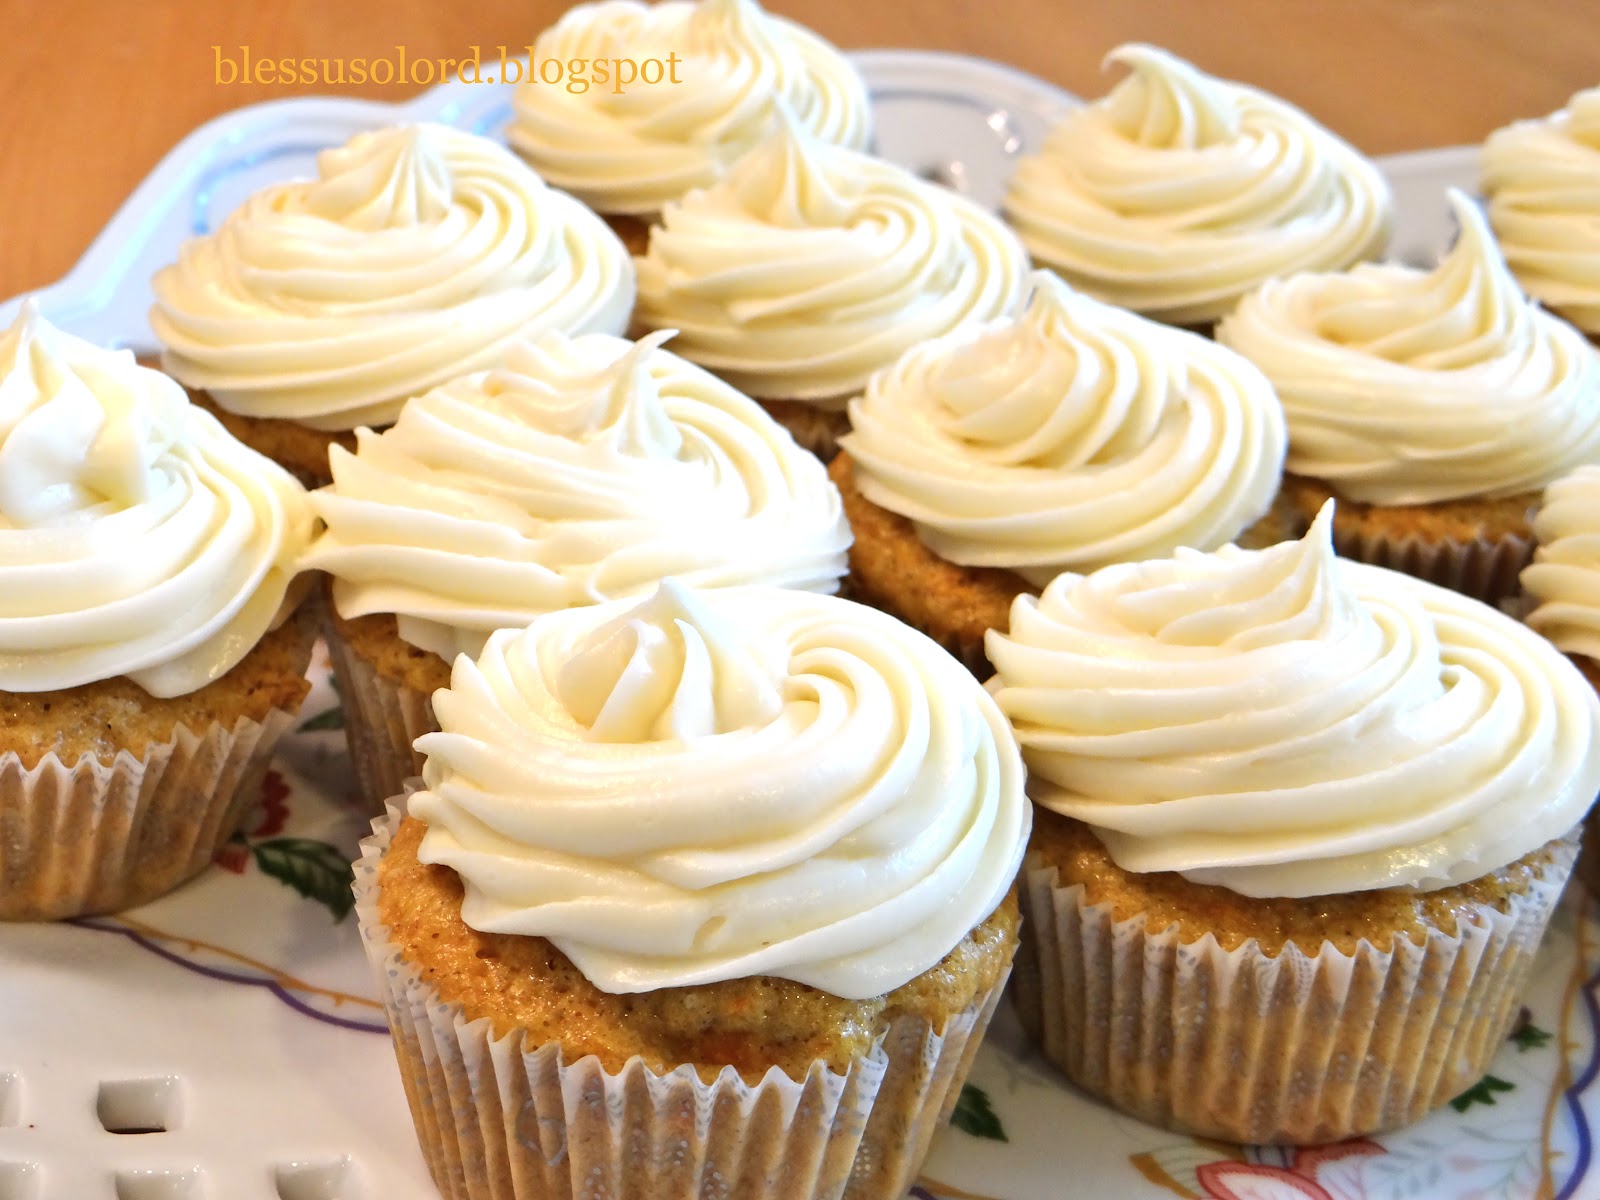
Carrot Cake Cupcakes


My second son, Joshua, has had a girlfriend for almost two years. Gulp. I know relationships of even several years can break up, but two years is a long time, and these two seem pretty happy together. I think her mom and I are both realizing this isn't just a high school romance and she recently invited us over for dinner, the first time we have enjoyed each others company for longer than five or ten minutes.

I asked what I could bring and she said "dessert." This was back when I was not eating wheat, so I was in a quandary. I wasn't eating wheat, she is diabetic, and my Noah can't eat tree nuts or peanuts. Not completely limiting, but still. I decided to make a wheat free recipe and a recipe with wheat. For the wheat-free treat, I had it on good authority that Land of Lakes has some good gluten free recipes. We won't talk about it, but I will tell you I didn't follow the recipe exactly (I subbed agave for the sugar because I wanted an essentially sugar-free dessert).

This recipe, I am told (because I didn't try them), was awesome, however. They smelled divine and looked beautiful. The recipe is essentially the one Annie at Annie's Eats uses, except for just a few changes (Argh, can I ever just follow a recipe? No.).


Carrot Cake Cupcakes
makes about 24

2½ cups all-purpose flour
1¼ t. baking powder
1 t. baking soda
1¼ t. ground cinnamon
1/8 t. ground cloves
scant 1/8 t. nutmeg
½ t. salt
1 lb. (6-7 medium) carrots
1½ cups granulated sugar
4 large eggs
1½ cups canola, safflower or vegetable oil

12 oz. cream cheese (not softened)
7½ tbsp. unsalted butter, at room temperature
1 tbsp. vanilla extract
3¾ cups confectioners’ sugar, sifted

Preheat the oven to 350° F.  Line two cupcake pans with paper liners.  

In a food processor fitted with a shredding disk, shred the carrots (you should have about 3 cups).  Place the carrots in a large mixing bowl and set aside.  Place the metal blade in the processor and  process the sugars and eggs until frothy and thoroughly combined, about 20 seconds.  With the machine running, add the oil in a steady stream through the feed tube.  Continue to process until the mixture is light in color and well emulsified, about 20 more seconds.  Transfer the mixture to the large mixing bowl with the carrots. Add the flour, baking powder, baking soda, spices and salt. Stir to combine thoroughly with carrots and other wet ingredients.

USe an ice cream scoop or spoon to spoon evenly into the prepared cupcake liners.  Bake for about 20-24 minutes or until a toothpick inserted in the center comes out clean.  Let cool in the pan at least 5 minutes, then transfer to a wire rack to cool completely.

To make the frosting, in the bowl of a stand mixer fitted with the paddle attachment beat the cream cheese and butter on medium-high speed until well combined and smooth, about 2-3 minutes.  Mix in the vanilla extract.  Gradually beat in the confectioners’ sugar until totally incorporated, increase the speed and then beat until smooth.  Frost cooled cupcakes as desired. (I did not have quite enough frosting to frost all the cupcakes using a decorator bag.)

Source: modified from Annie's Eats

Sunday, July 8, 2012

Pavlova


Wikipedia: Pavlova is a meringue-based dessert named after the Russian ballet dancer Anna Pavlova. It is a meringue dessert with a crisp crust and soft, light inside. The name is pronounced /pævˈloʊvə/ or /pɑːvˈloʊvə/, unlike the name of the dancer, which was /ˈpɑːvləvə/ or /ˈpævləvə/. The dessert is believed to have been created in honour of the dancer either during or after one of her tours toAustralia and New Zealand in the 1920s. The nationality of its creator has been a source of argument between the two nations for many years, but formal research indicates New Zealand as the source. The dessert is a popular dish and an important part of the national cuisine of both countries, and with its simple recipe, is frequently served during celebratory and holiday meals.


~~~~~

Because I am doing a trial of wheat-free eating, I have been on the lookout for creative desserts that are not: 1) cakes, 2) pies, or 3) cookies, which are pretty much my entire repertoire of dessert recipes, except for ice cream.

This recipe not only fulfilled my need for wheat-free dessert, but it looked divine. Definitely put this on your list of recipes to try, and any Russian feast day, the Assumption, or the Ascension would do just great. I did not really need an excuse, so I made it today.

I basically followed the recipe found at Joy of Baking, but only for the meringue. I sugared the raspberries and let them create their own syrup, and then whipped the cream as I always do. Make sure you have enough people to eat it when you make it, because you can't save this decadent treat.


Pavlova

2 cups raspberries (or other berries)
3 T. sugar

4 egg whites (at room temp)
1 cup sugar
1 t. white vinegar
1/2 T. cornstarch

1 cup whipping cream
3 T. powdered sugar
1 t. vanilla

Gently rinse raspberries and shake dry. Place in a bowl and sprinkle with 3 T, sugar. Shake gently to distribute sugar. Let sit at room temp. 

Preheat oven to 250 degrees F. On a sheet of parchment, make a 7-inch circle with pencil. Cut circle out, leaving about an inch border. Place on a baking sheet, pencil side down.

Place egg whites in bowl of mixer. Beat at high speed until they hold a soft peak. Slowly sprinkle in sugar, a little at a time, until all sugar is incorporated. Beat until glossy and holds stiff peaks. Sprinkle the vinegar and cornstarch over the top and gently fold in.

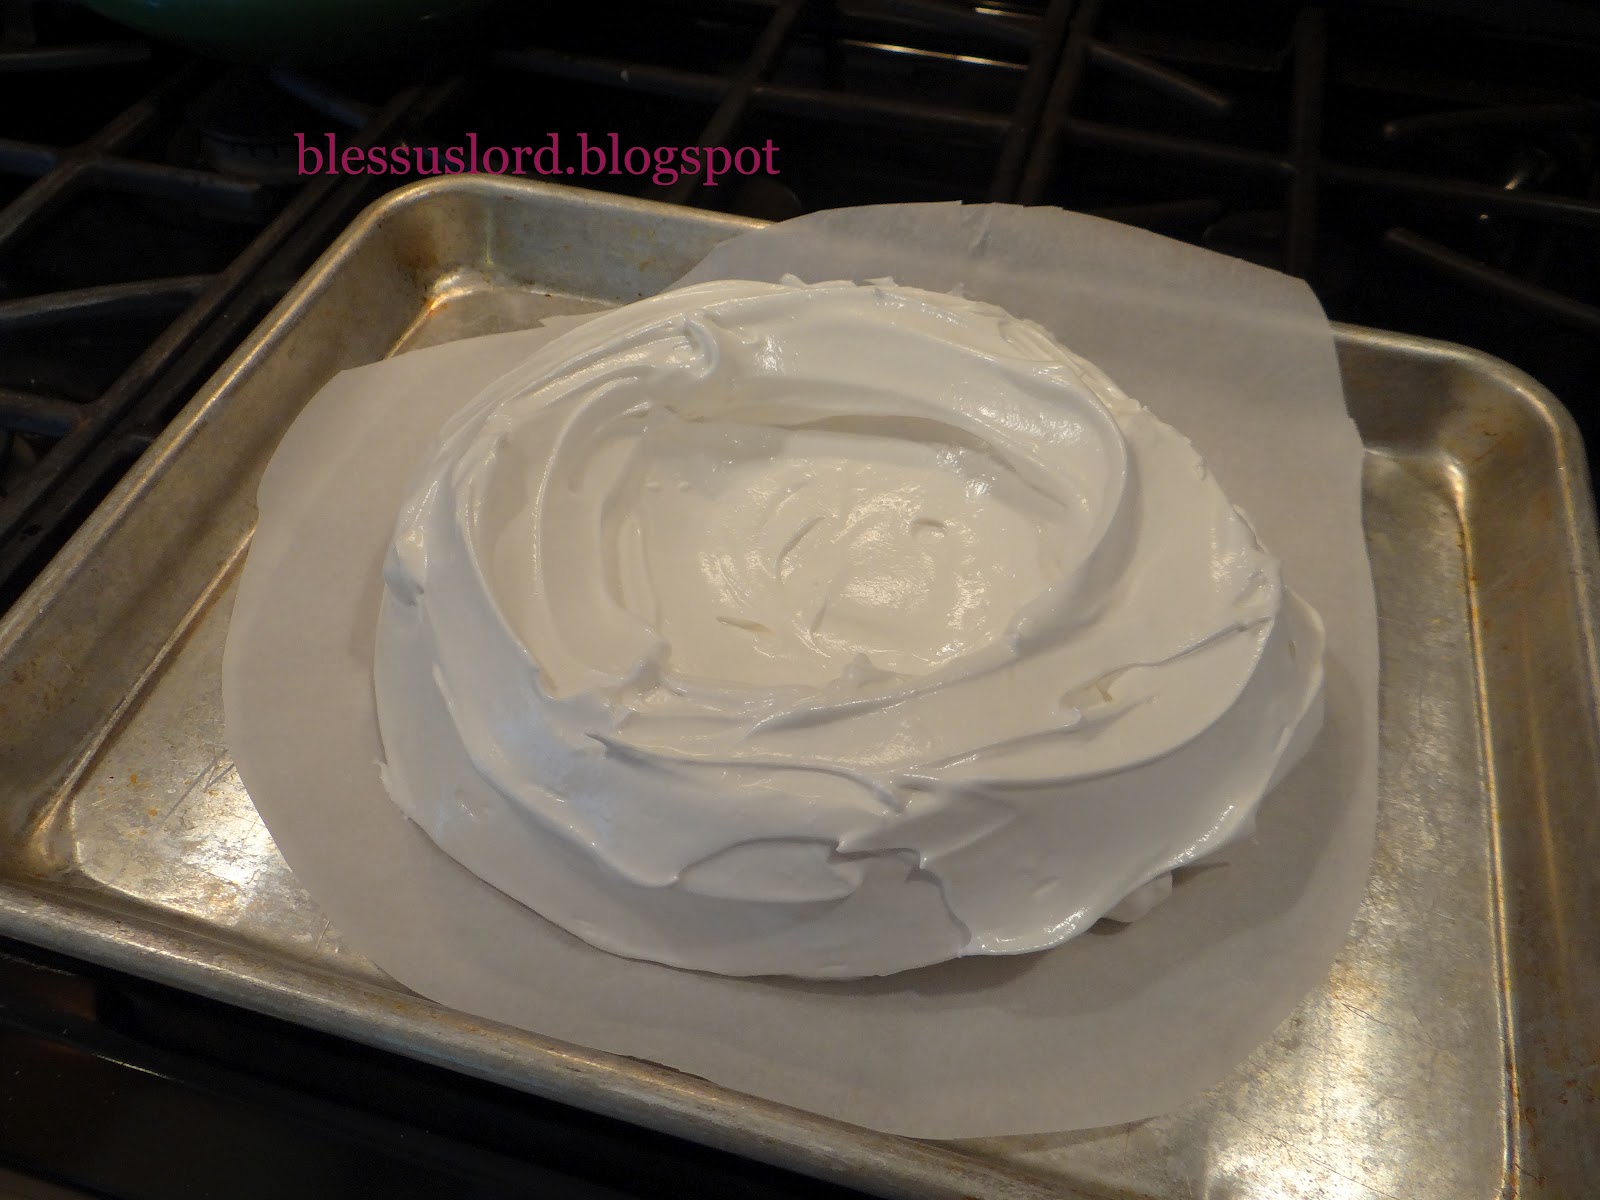
Spoon egg mixture onto parchment and push to fill the circle, mounding meringue up on the edges more than in the middle (like a bowl).


Bake at 250 degrees until meringue is lightly golden and and outside is dry, about 60-75 minutes (outside will be dry but inside will be sort of marshmallowy). Let cool on a wire rack.

When ready to serve, place whipping cream in mixer bowl and beat on high with powdered sugar and vanilla until cream holds firm peaks.

Spoon cream into center of meringue shell. Spoon berries on top. Serve immediately.

Wednesday, June 27, 2012

Salted Deep Dish Brownies


I have recently become aware of how the simple sprinkling of coarse salt on a baked good can completely change the taste. I experimented for the first time last year with Jeni's Salted Caramel Ice Cream (apparently I forgot to blog about that one), and then at Christmas with Annie's Salted Caramel Chocolate Shortbread Bars. Of course, I had tried neither of those recipes without the salt, so I can't say how the salt changed the flavor.


I make these brownies all the time, however, so I can honestly say a little sprinkle of salt truly changes the flavor. With a really coarse sea salt, you get the salty flavor and tiny bit of crunch in almost every bite. It's really remarkable how good, how different it is. I saw them somewhere online -- it may have been Annie's Salty Caramel Brownies -- but I didn't want caramel, I just wanted the chocolate with the salt. So I used my favorite old stand-by brownie recipe, which is so quick and easy, but so chocolatey and fudgie, and after they cooled for a short while, I cut them and then sprinkled some coarse sea salt across the top (I think cutting them after sprinkling would displace the salt unless you cut them and left them in the pan). Yum. I then made them another day and we placed them beneath a scoop of brown sugar ice cream and hot fudge sauce. Yum. I don't think you can go wrong here.


Salted Deep Dish Brownies
makes 16


3/4 cup butter, melted
1 1/2 cups white sugar
1 1/2 t. vanilla extract
2 eggs
3/4 cup all-purpose flour
1/2 cup unsweetened cocoa powder
1/4 t. baking powder
1/2 t. salt
coarse sea salt

Preheat oven to 350 degrees F (175 degrees C).
Grease an 8 inch square pan.
In a large bowl, blend melted butter, sugar and vanilla.
Beat in eggs one at a time.
Combine the flour, cocoa, baking powder and salt.
Gradually blend into the egg mixture.
Spread the batter into the prepared pan.
Bake in preheated oven for 40 to 45 minutes, or until brownies begin
to pull away from the sides of the pan.
Let cool for about 25 minutes until the top feels coolish but the bottom is still warm. 
Cut brownies with a bench knife of sharp kitchen knife. Sprinkle with sea salt to taste.

Thursday, June 21, 2012

Roasted Strawberry Ice Cream


I am so sorry you can't get a lick here on your computer screen


My plan this week was to get so much blogging done -- get all those recipes posted that have photos sitting on the desktop. Alas, life never goes just that way, and other things got done instead. But, that's ok, they were real things. At least more real than blogging about food.

This recipe needed to be posted next, however, because it was so divine, and you need to make it soon. Like today. If you haven't put that ice cream machine on your Christmas list, I don't know what you're waiting for. Look at this delicious ice cream you can make at home. All by yourself!

I read about it at The Sweets Life and it caught my eye because it's a Jeni's recipe. Jeni's ice cream started in our fair city (actually, I intensely dislike Columbus, so I take that "fair" back). Actually it started here, and I'm not sure it has gone anywhere else, but I don't frequent Jeni's because I'm a...tightwad. Yup, about some things I am. Actually about most things I am, except shoes, and coats, and sofas. Those things deserve to have money spent on them so they last. But very few other things. I can always make it or find it elsewhere for less. And in this case, I can make it. And I did.

It was so very good, and as Natalie's friend Mike said, it really is legit. It's the best ice cream I've had so far this season.

I screwed the recipe up twice, once on purpose and once by accident, and it turned out great, so I am posting it as I screwed it up because 1) it was easier this way, and 2) you have no waste.

By the way, don't let the term "roasted" fool you. They are really just warmed up enough to soften. I prefer uncooked strawberries (like fresh berry pie and freezer jam) to cooked, and this ice cream tasted fresh.


Roasted Strawberry Ice Cream


1 pint strawberries, hulled and sliced 1/2-inch thick
1/3 c. sugar
3 T. fresh lemon juice (or quality bottled)
1 1/2 c. whole milk 

2 T. cornstarch
2 oz cream cheese, softened
1/8 t. fine sea salt
1 1/4 c. heavy cream
2/3 c. sugar
2 T. light corn syrup
1/4 c. buttermilk


To roast the strawberries, preheat the oven to 375F. Mix the strawberries with the sugar and place in an 8-inch square glass baking dish (or pie plate) stirring to combine. Roast for 8 minutes, just until soft. Allow to cool slightly.

 In a food processor or a blender, puree the strawberries with the lemon juice. 

To make the ice cream base, mix 2 T. of the milk with the cornstarch in a medium bowl, mixing to make a smooth slurry. Add the cream cheese and salt and stir to combine.

 Fill a large bowl with ice and water and set aside.

 In a 4-quart saucepan, combine the remaining milk, cream, sugar, and corn syrup, and cream cheese/cornstarch mixture, heating to a rolling boil over medium-high heat. Boil for 2 to 4 minutes, cooking until slightly thickened. Remove from heat.

 Stir in the strawberry puree and buttermilk, mixing well. Pour the mixture into a bowl and nestle down into the ice water. Allow to stand for about 30 minutes, until chilled.

 Churn ice cream according to ice cream maker instructions. Pack the ice cream into an airtight storage container and freeze until firm, at least 4 hours (or just eat it straight from the ice cream machine -- yum!).


Source: modified from Jeni's Splendid Ice Creams at Home via The Sweets Life


My sweetheart enjoying his ice cream by the bonfire


Friday, June 8, 2012

Noah's Ginormous Oreo-Stuffed Chocolate Chip Cookies


My youngest son, Noah (and the biggest as it turns out), has been harassing me to make these cookies. Oreo-stuffed anything is not my idea of a good cookie, but after he begged and begged and even offered to help, I gave in.

I admit, they were good. I couldn't have eaten more than one, but they were pretty darn good. And Noah was really happy with the whole helping-mom-make-cookies thing. All by himself. Which is really funny since he's a good head-and-a-half taller than me.

And you better believe he hid the cookie jar after we filled it. He is forcing his siblings to ask him for a cookie. Tee hee.

You can find the recipe all over the internet and in foodie magazines, but Noah did the research and he picked the Picky Palate's recipe. We followed the recipe exactly the way it was written, but ours required a slightly longer cooking time. They looked pretty gooey after the timer went off, so I gave 'em another five or so. I altered the time in the recipe to my oven and taste. We had regular Oreos, not Double Stuff, so less of our cream shows. You decide which to use.


Oreo Stuffed Chocolate Chip Cookies
makes about 2 dozen really big cookies

2 sticks butter, softened
3/4 cup packed light brown sugar
1 cup granulated sugar
2 large eggs
1 T. pure vanilla
3 1/2 cups all purpose flour
1 t. salt
1 t. baking soda
10 oz. bag chocolate chips (I used semi-sweet, Ghiradelli)
about a dozen Oreo cookies


 Preheat oven to 350 degrees F.   In a stand or electric mixer cream butter and sugars until well combined.  Add in eggs and vanilla until well combined.

 In a separate bowl mix the flour, salt and baking soda.  Slowly add to wet ingredients along with chocolate chips until just combined.  Using a cookie scoop take one scoop of cookie dough and place on top of an Oreo cookie.  Take another scoop of dough and place on bottom of Oreo cookie.  Seal edges together by pressing and cupping in hand until Oreo cookie is enclosed with dough.  Place onto  baking sheet and bake cookies 12-18 minutes or until cookies are baked to your liking.  Let cool for 5 minutes before transferring to cooling rack.  


Source: modified from The Picky Palate

Wednesday, June 6, 2012

Got teens?


School's out for the summer and suddenly I have teen boys at home all day, and they are hungry!

I don't realize how much food they don't eat when they are just somewhere else. Holy cow! It's all they think about.

Last night after dinner they were clamoring for dessert (two boys ate 16 Drumsticks in four days) and I had just seen this dessert at sophistimom on Pinterest (gosh it's hard these days to find the original recipe. Click, click, click....).

This dessert just has "teenage boys" all over it.

Stressed out mommies, too.

It was delicious and though it served eight pieces, if you have a big family, you'd best invest in another pan. This is a keeper.

PS I used an 8-inch cast iron skillet and followed the recipe exactly, except for using chocolate chips (Ghiradelli dark) instead of chunks.


Skillet Chocolate Chipper

serves 8


1 stick (8 tablespoons) unsalted butter
1/2 cup granulated sugar
1/2 cup light brown sugar
1 teaspoon pure vanilla extract
1 egg
1 1/2 cups unbleached all-purpose flour
1/2 teaspoon baking soda
1/4 teaspoon kosher salt
1 cup chocolate chunks (or chocolate chips)


Preheat oven to 350 degrees. Melt butter in an 8 inch cast iron skillet set over medium-low heat. Stir in sugars and vanilla and remove from heat. Let rest until pan is warm, but no longer very hot, about 5 minutes.

 Crack an egg onto the butter and sugar mixture, and use a fork to whisk it well into the mixture. Place flour, baking soda, and salt on top, and very carefully stir into the mixture until smooth and well-mixed. Stir in chocolate chunks. Place in the oven for 15-20 minutes*, or until starting to turn golden on the top and around the edges, but soft in the center. Serve with vanilla ice cream.

* Mine took at least 10 minutes longer than the recommended time, but it would have been good with only five minutes more -- it wasn't terribly gooey and gooey is a good thing.


Wednesday, May 30, 2012

Strawberries, sour cream, and turbinado...oh my


You know about three in the afternoon, when your rear starts to drag, and you seriously wonder whether you can make it until 9 p.m. when you might possibly be able to at least sit, if not lie, down.

I have a little pick-me-up for you.

A little sumpin' sumpin' (no, no, not the alcoholic kind, just the special treat kind).

I had read about these little babies in a few places on the web, but really, they didn't sound so special, until one day I guess I must have actually thought about it, or maybe it was just the arrival of really good strawberries at the grocery store, and I thought, "Hmmm, that might be worth trying."

And I did.

Last evening, Doug took the kids up to the pool for exactly one hour after dinner, and I had all the dinner dishes to wash and put away. But when I finished...I pulled out a brand new, just-bought-that-day quart of strawberries, the (full fat) sour cream (and the Greek yogurt just for testing sake), and the box of turbinado sugar (which had exactly one and one-half tablespoons left in it -- well not exactly, but pretty close. I didn't measure.)

Rinse berries and blot dry with a paper towel. Check. (I washed three)

Stir the sour cream up until creamy and dip two strawberries. I dipped the third in Greek yogurt. Check. (Yeah, just dip them right in the container. Who's gonna tell?)

Sprinkle with turbinado sugar. Check.

Place on a pretty plate and repeat with two more (Or however many you want, but don't share. Do. Not. Share. This is mommy's treat.)

Take plate and sit -- you must sit and enjoy.

Bite the end off and then nibble, nibble all the way around until there is nothing left but leaves. (I tossed those over the deck rail so I didn't have to see them on my plate.)

In no time at all I ate all three and then I.licked.the.plate. I did! Really. Nobody was watching.

And then I went back to the kitchen where I had put everything away because I was so convinced these little babies were going to be no big deal and I got it all back out, except I got the brown sugar out since there was no more turbinado sugar. And I tested it (just for you, my friend) to see if the brown sugar was as good. And it was not. But it was good, so if you only have brown sugar, go for it. But I really do like the crunchiness of the turbinado sugar.

Oh my, just thinking about them makes me anxious for three o'clock. Except I have a sick little chick up in bed and I can't run to the store for more turbinado. I'll just muddle through with brown sugar.

I tell you there might not be enough strawberries left in the world for these babies.

You'll thank me. You will.

PS There was only a slight difference in the ones made with sour cream and the one with Greek Yogurt. I used 2% Fage Greek yogurt, so it could have been the little bit of extra fat from the full fat sour cream that made the difference. Don't skimp here. Go for the real deal, but in a pinch the Greek yogurt will do.

Tuesday, May 29, 2012

Pentecost Dessert


This past weekend was action-packed with cooking. In fact, I felt like I was in the kitchen from Saturday afternoon to Monday night. I don't mind having folks over, but on big holiday weekends it does get to be a lot.

 On Sunday, we celebrated the holiday with my family, because my Mom's birthday always falls right around Memorial Day and we celebrated her birthday. It also happened to be Pentecost Sunday, so we enjoyed two desserts -- both of which would make nice desserts for future Pentecost Sundays.


The first are the Tongues of Fire cupcakes that were posted at Catholic Cuisine. Little Miss Fancy Pants Kelly made those cupcakes pictured at Catholic Cuisine and I'll tell you -- those little tongues of fire are not easy! It would have helped had I purchased the mini marshmallows I was supposed to buy (had three bags of the big kind in my pantry but nary a mini in sight). I made about 100 tongues before I was satisfied with enough for five cupcakes. And then I frosted and sprinkled sugar on the rest. It was 10 p.m. Saturday night and I was done (in more ways than one)!

The cupcakes were yummy red velvet and the frosting traditional cream cheese -- both found here.


The second dessert was a gorgeous fruit tart pie that I first saw at Cheryl's. I looked all over my Podunk little town for a tart pan and came up with nothing. But I was so determined to make that dessert I decided to make it in a pie plate. Bad move. It was pretty, and very tasty, but I pretty much had to dig it out of the pie pan. I guess I'll order a tart pan from amazon because it was good I want to be able to make it over and over. If you want to make it for Pentecost just call it a Fruits of the Holy Spirit Tart. We only had five fruits, but who's counting? I told them to pick their favorite five fruits (of the spirit). I made Paula's recipe (other than using a pie pan instead of a tart pan) just as the recipe was written. Oh, and I heated up some homemade strawberry jam and strained it instead of making the glaze.

I'm linking up to the gals over at Catholic Cuisine if you want to check some other great ideas for celebrating our Church's birthday!

Friday, May 4, 2012

New York Style Cheesecake


hello?

anybody out there?

 I know you're busy.

Too busy to cook?

 Maybe you're not too busy to make cheesecake. I promise you can have this cheesecake in the oven in less than five minutes. You don't even need to wait for the preheat.

 This is the cheesecake I grew up with. I must say it seemed like the most glamorous thing my mother made, but now that I make it myself, I realize it's probably the easiest thing she ever made. You don't even make a crust -- just add 2 tablespoons of flour to the cheese mixture and it settles on the bottom. It's pure cheesecake deliciousness.

 I made my last cheesecake (pictured) with homemade cream cheese. I am not going to get into that right now, but it was more wet than block cream cheese from the store, thus my cheesecake was more moist. It was delicious, but the picture does not look exactly like the cheesecake normally. It gets higher, and more firm.


 New York Cheesecake 
serves 12-16

 4 (8 oz) blocks cream cheese (full fat) 
1 pint sour cream (full fat) 
3/4 cup milk (preferably whole milk)
 4 eggs 
1 T. vanilla extract 
1 1/2 cups sugar 
4 T. flour

 Bring cream cheese and sour cream to room temp -- just get them out in the morning and let them sit. 
Grease and flour a 10" springform pan. 

Cream the cheese and sour cream for a minute or so, until it is fully combined. Add eggs, sugar, vanilla and flour. Add milk. Beat only until all ingredients are incorporated. 

Pour mixture into pan (I wrap foil around the bottom in case the pan leaks a little). Place in a cold oven. Turn oven on to 375 degrees. Bake for one hour. 

Turn off oven but don't open the door. Leave cheesecake in oven for one hour. 

Remove from oven and cover with foil. Let sit at room temperature for two hours. Chill until ready to serve (several hours or overnight).


Wednesday, May 2, 2012

Cream-Filled Chocolate Cupcakes


This recipe is a rerun on my food blog, but it's been a couple years since I posted it and I had such a hard time finding it here that I thought I'd repost it.

 I brought these cupcakes to a family get-together on Easter Monday (hence the candy egg-topped frosting) and my father-in-law later said they were the best thing he ever tasted. Ever! He cracks me up. He is either a total brown-noser or he just loves sweets too much! I suspect it's the former, but he does have a sweet tooth.

 The cake part of these cupcakes is a really yummy cake recipe and would be wonderful even without the cream filling. They dome very well for a scratch cupcake and are moist and tender. I find that chocolate cupcakes really are superior to white in the moist and tender department.

 The cream filling part is easy peasy. I fill a decorator bag (with a star tip), and then push a sharp-tipped knife through the cupcake paper on the bottom, stick the point of the bag in and squeeze to the count of three. No need to cut away the cake, the cream just oozes in and makes a little pocket. Lovely!

 The frosting is a soft, chocolate buttercream, just the right topping, but they are also yummy with this Vanilla Buttercream on top.

The recipe makes a lot so they are perfect for a bake sale, scouting get-together, or just a family party!


Chocolate Cream-Filled Cupcakes
makes about 30


3 c. all-purpose flour
2 c. sugar
⅓ c. cocoa
2 t. baking soda
1 t. salt
2 eggs
1 c. milk
1 c. vegetable oil
1 c. water
1 t. vanilla extract


~~~~~


Filling

¼ c. butter, softened
¼ c. shortening
2 c. confectioners' sugar
3 T. milk
1 t. vanilla extract
pinch salt


In a mixing bowl, combine the first five ingredients.

Add eggs, milk, oil, water and vanilla.
Beat until smooth, about 2 minutes.
Fill paper-lined muffin cups half full.
Bake at 375 degrees F for 15-20 minutes or until a toothpick inserted near the center comes out clean.
Remove from pans to wire racks to cool completely.


In a mixing bowl, combine butter, shortening, confectioners' sugar, milk, vanilla and salt; beat until fluffy, about 5 minutes.
Fill a decorator bag, fitted with a star tip, with filling. Slit the paper on the botton of the cupcake just slightly. 


Insert tip and squeeze to the count of three.


Frosting

1/4 c. butter, softened
2/3 c. cocoa
3 c. powdered sugar
1 teaspoon vanilla extract
about 1/3 c. milk


In a mixing bowl, whip butter. Add cocoa. Alternately add powdered sugar and milk, beating to spreading consistency. Stir in vanilla. Add small amount additional milk, if needed.

(If you are going to frost cupcakes using a decorator bag and tip,
 you will want to make more frosting -- 1.5 or 2 times the recipe)